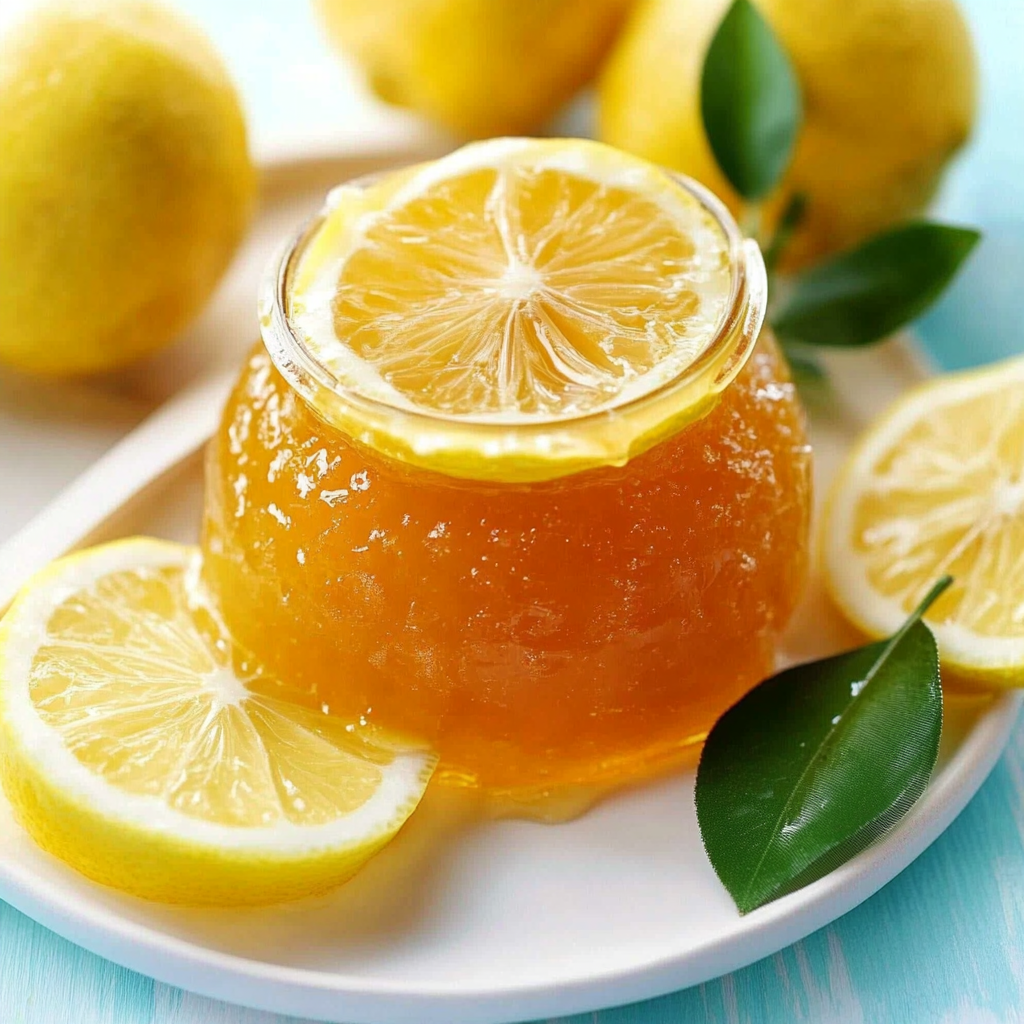
Irresistible Meyer Lemon Jelly Recipe You’ll Love!
There’s something truly magical about capturing the vibrant essence of Meyer lemons in a jar of homemade Meyer Lemon Jelly. This delightful recipe brings the bright, tangy flavor of these unique lemons to your kitchen, and it’s an absolute favorite of mine. Whether you’re spreading it on warm toast, stirring it into yogurt, or simply enjoying it by the spoonful, this jelly is perfect for any occasion—from cozy breakfasts to festive gatherings.
What I love most about making Meyer Lemon Jelly is how easy it is to whip up a batch. The sweet and tart balance of flavors is not only refreshing but also makes for a wonderful gift. Friends and family will be impressed by your homemade treat, and you’ll feel proud knowing you created something so delicious from scratch.
Why You’ll Love This Recipe
– Simple process: Making Meyer Lemon Jelly is quick and straightforward, perfect for both beginners and seasoned cooks.
– Bright flavor: The unique taste of Meyer lemons adds a delightful twist that elevates any dish.
– Versatile use: Enjoy it on toast, as a glaze, or even in desserts—this jelly is incredibly versatile!
– Homemade goodness: There’s nothing quite like spreading something you made yourself; it adds a personal touch to every bite.
Ingredients You’ll Need
Gathering the right ingredients is key to making this delectable jelly. Here’s what you’ll need:
For the Jelly
– 2 cups Meyer Lemon juice, fresh squeezed
– 2 cups water
– 1 package SureJell Pectin
– 4 1/2 cups sugar
Variations
One of the joys of cooking is experimenting with flavors. Here are some fun variations you can try with your Meyer Lemon Jelly:
– Add herbs: Toss in some fresh thyme or rosemary while cooking for an aromatic twist.
– Mix in berries: Stir in crushed raspberries or blueberries for a fruity addition that pairs beautifully with the lemon.
– Spice it up: A pinch of ginger or turmeric can add warmth and depth to your jelly.
– Use other citrus: If you’re feeling adventurous, substitute some or all of the Meyer lemons with oranges or limes for a different flavor profile.
How to Make Meyer Lemon Jelly
Step 1: Combine Ingredients
Mix lemon juice, water, and SureJell together in a large, heavy-bottom pan. This step creates the base for your jelly and ensures that the pectin will properly dissolve when heated.
Step 2: Bring to a Boil
Bring to a rolling boil and let it boil for 1 minute. Boiling activates the pectin, which helps your jelly set perfectly.
Step 3: Add Sugar
Add sugar to the mixture. It’s essential at this stage because sugar not only sweetens the jelly but also contributes to its preservation.
Step 4: Boil Again
Bring back to a rolling boil and let it boil for another minute. This second boiling ensures that everything is well combined and allows the flavors to meld beautifully.
Step 5: Remove from Heat
Remove from heat once done boiling. It’s important not to leave it on too long after this point so that the mixture doesn’t overcook.
Step 6: Jar It Up
Ladle into sterile, hot jars, leaving a 1/4″ headspace. Properly filling jars helps maintain freshness and prevents spoilage.
Step 7: Seal Jars
Wipe rims of jars clean before adding rings and lids. This step ensures an airtight seal which is vital for preserving your jelly.
Step 8: Process in Water Bath
Process in a water bath canner for 8 minutes. This final step seals the jars completely and helps keep your delicious Meyer Lemon Jelly safe for months to come!
Enjoy every spoonful of your homemade Meyer Lemon Jelly!
Pro Tips for Making Meyer Lemon Jelly
Making Meyer Lemon Jelly is a delightful experience that fills your kitchen with a refreshing citrus aroma. Here are some tips to ensure your jelly turns out perfectly every time.
– Use fresh lemons: The flavor of your jelly will depend on the quality of your lemons, so always opt for fresh Meyer lemons for the best taste.
– Measure accurately: Precision is key in jelly-making. Use measuring cups and spoons to ensure you’re adding the right amounts of juice, water, and sugar.
– Sterilize jars properly: To keep your jelly safe and tasty, make sure to sterilize your jars before filling them. This helps prevent spoilage.
– Check the gel stage: If you’re unsure if your jelly has reached its gel stage, do the plate test. Place a spoonful on a cold plate, let it sit for a minute, and push it with your finger. If it wrinkles and holds its shape, it’s ready to jar.
– Experiment with flavors: While Meyer lemons are delicious on their own, feel free to add herbs like thyme or mint for an extra layer of flavor.
How to Serve Meyer Lemon Jelly
Meyer Lemon Jelly is versatile and can be enjoyed in various ways. Whether you slather it on toast or use it as a topping for desserts, its bright flavor adds a special touch.
Garnishes
– Fresh mint leaves: A few sprigs of mint can elevate the presentation and add a refreshing contrast.
– Thin lemon slices: A delicate slice of lemon on top not only looks beautiful but also enhances the citrusy flavor.
– Whipped cream: For desserts, a dollop of whipped cream pairs wonderfully with the tanginess of the jelly.
Side Dishes
– Toast or bagels: Spread your jelly generously on warm toast or bagels for a delightful breakfast treat.
– Yogurt: Stir some Meyer Lemon Jelly into plain yogurt for a refreshing snack or breakfast option.
– Cheese platter: Pair with soft cheeses like brie or goat cheese for an elegant appetizer.
– Scones: Serve alongside freshly baked scones for a delightful afternoon tea.

Make Ahead and Storage
Preparing Meyer Lemon Jelly ahead of time is great for meal prep. It allows you to enjoy this zesty treat whenever you please!
Storing Leftovers
– Keep in cool places: Store jars in a cool, dark place like a pantry or cupboard away from direct sunlight.
– Check seals regularly: Ensure that jar lids are sealed tightly. If any jars haven’t sealed properly after processing, refrigerate immediately and use within two weeks.
Freezing
– Freezing in containers: While it’s best enjoyed fresh, you can freeze jars if necessary. Just make sure to leave space at the top of each container as jelly expands when frozen.
– Thawing process: When ready to use, thaw in the refrigerator overnight rather than at room temperature to maintain texture.
Reheating
– Using low heat: If you need to reheat your jelly (for example, if it’s too thick), do so gently over low heat on the stove until it reaches your desired consistency.
– Avoid boiling again: Don’t boil it again once it’s made; simply warm it slowly.
FAQs
If you’re new to making jams and jellies, you might have some questions! Here are answers to common queries about Meyer Lemon Jelly.
Can I substitute regular lemons for Meyer lemons?
While regular lemons can be used in place of Meyer lemons, they have a more tart flavor. Adjust sugar levels accordingly if you prefer less tartness.
How long does homemade Meyer Lemon Jelly last?
When stored properly in sealed jars, homemade Meyer Lemon Jelly can last up to one year. However, once opened, consume within three weeks if kept refrigerated.
Can I use other types of pectin?
Yes! You may use different types of pectin depending on availability. Just be sure to follow package instructions as different pectins may require varying sugar levels and cooking times.
Final Thoughts
I hope this recipe inspires you to create something truly delicious with Meyer Lemons! The bright flavor and cheerful color are bound to bring joy wherever they are served. Don’t hesitate—give this recipe a try today! Happy cooking!
Meyer Lemon Jelly
Ingredients
Method
- Mix lemon juice, water, and SureJell together in a large, heavy-bottom pan.
- Bring to a rolling boil and let it boil for 1 minute.
- Add sugar to the mixture.
- Bring back to a rolling boil and let it boil for another minute.
- Remove from heat once done boiling.
- Ladle into sterile, hot jars, leaving a 1/4" headspace.
- Wipe rims of jars clean before adding rings and lids.
- Process in a water bath canner for 8 minutes.