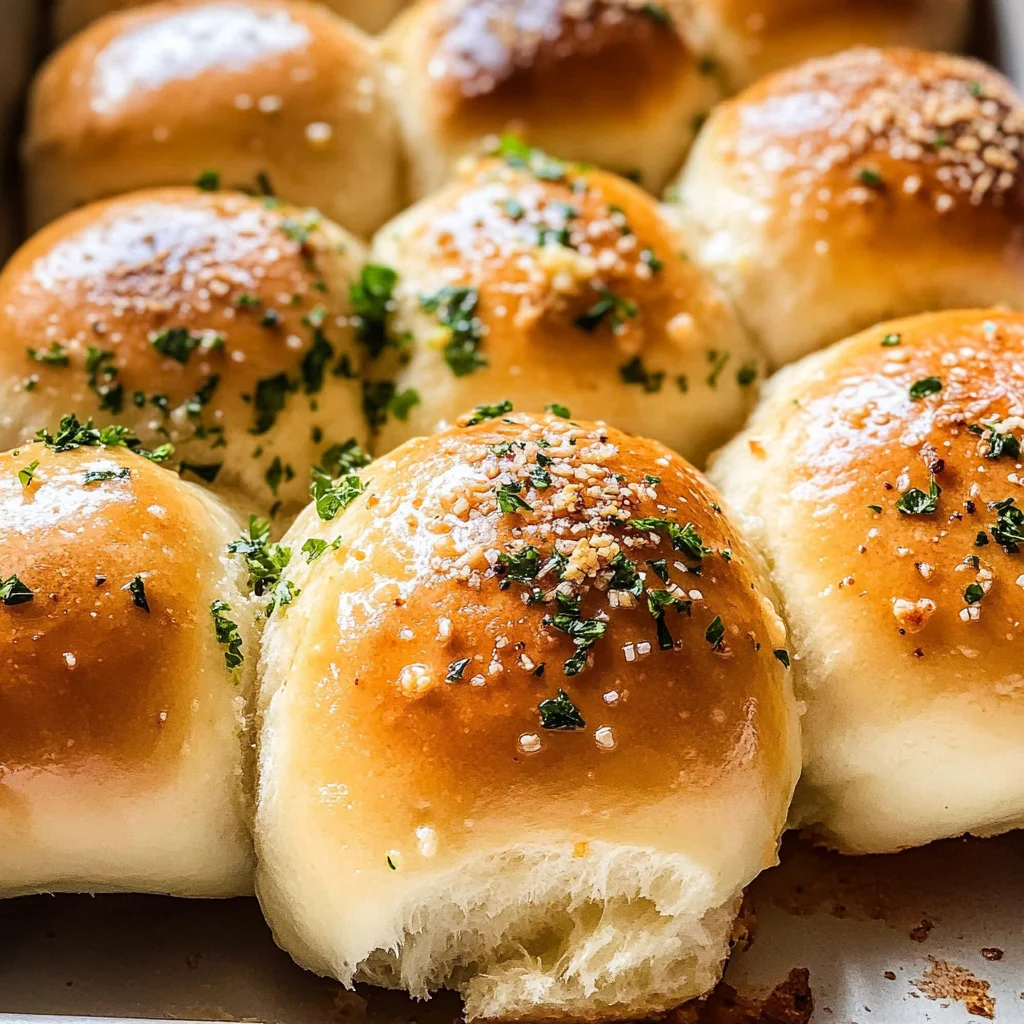
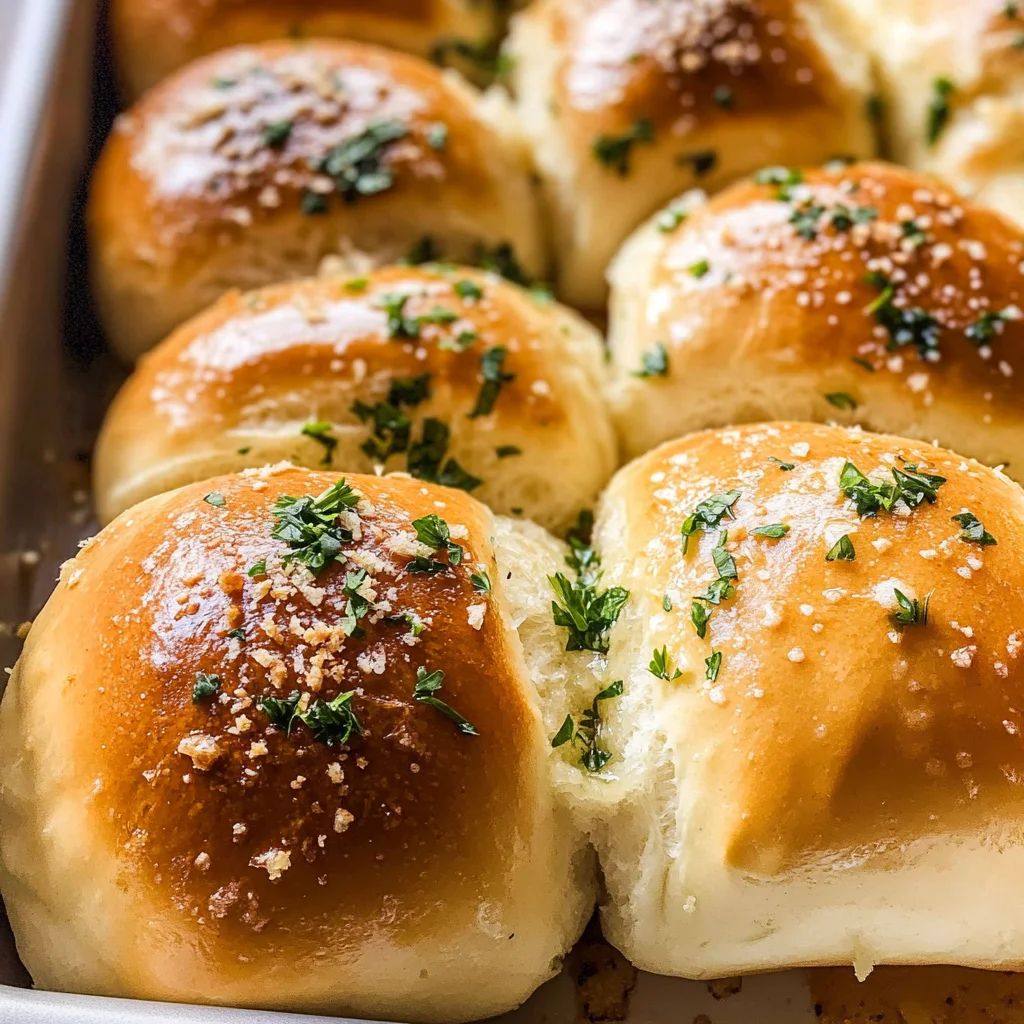
Garlic Bread Rolls
If you’re looking for a cozy addition to your dinner table, these Garlic Bread Rolls are the perfect treat! There’s nothing quite like the warm aroma of freshly baked rolls infused with garlic, filling your kitchen and heart with joy. This recipe is a family favorite of mine because it brings everyone together, whether it’s a busy weeknight or a festive gathering. Plus, who can resist that golden, buttery crust?
These delightful rolls are soft, fluffy, and bursting with flavor. They make a wonderful side dish for pasta nights or can even stand alone as a delicious snack. Trust me; once you try them, they will become an essential part of your meal rotation!
Why You’ll Love This Recipe
- Easy to make: With simple steps and common ingredients, these rolls come together effortlessly.
- Family-friendly: Everyone loves warm, buttery rolls! Kids and adults alike will enjoy these tasty treats.
- Perfect for any occasion: Whether it’s dinner with friends or a cozy family meal, these garlic bread rolls fit right in.
- Make-ahead option: Prepare the dough in advance and bake them fresh when you need them!
- Deliciously flavorful: The rich garlic herb butter takes these rolls to another level of yum!
Ingredients You’ll Need
Let’s gather some simple and wholesome ingredients to create these scrumptious Garlic Bread Rolls. Each one plays an important role in making the rolls soft and flavorful.
For the Dough
- 4 1/2 tablespoons unsalted butter
- 2 tablespoons minced garlic
- 3 1/2 cups + 1 tablespoon all-purpose flour (See notes below for measuring)
- 3 tablespoons chopped fresh parsley
- 1 tablespoon granulated sugar
- 2 1/4 teaspoons instant yeast
- 1 teaspoon fine sea salt
- 1 cup whole or 2% milk (warmed to 110°F)
- 1 large egg (room temperature)
For Topping
- 1 beaten egg (for brushing the tops)
- 2 tablespoons unsalted butter
- 1 tablespoon minced garlic
- 1 tablespoon chopped fresh parsley
- Flaky sea salt (for finishing)
Variations
The beauty of Garlic Bread Rolls lies in their flexibility! You can easily customize them based on your preferences or what you have on hand.
- Add cheese: Sprinkle some shredded mozzarella or cheddar inside the dough before rolling them up for a cheesy surprise!
- Herb infusion: Experiment with different herbs like rosemary or thyme for extra flavor in the dough.
- Spicy kick: Add a pinch of red pepper flakes to the garlic butter for a little heat.
- Stuffed goodness: Fill each roll with your favorite spreadable cheese or pesto before baking for an extra burst of flavor.
How to Make Garlic Bread Rolls
Step 1: Prepare Your Pan
Lightly butter the bottom and sides of a 9×13 pan. This helps prevent sticking and gives your rolls a lovely golden color while baking.
Step 2: Create the Garlic Butter
In a small pot, melt the unsalted butter over low heat. Add in the minced garlic and cook until fragrant—about 1-2 minutes. Make sure not to burn it! Remove from heat and let it cool while you prepare the rest of your ingredients.
Step 3: Mix Dry Ingredients
In your stand mixer bowl, combine all-purpose flour, parsley, sugar, yeast, and salt. Mixing these dry ingredients first ensures even distribution of flavors throughout your dough.
Step 4: Combine Wet Ingredients
Add the warmed milk, egg, and cooled garlic butter into the dry mix. Knead on low speed with your dough hook until everything comes together into a smooth and slightly tacky dough—this should take about 10-12 minutes. If it’s too sticky to handle, sprinkle in more flour gradually until it feels just right!
Step 5: Shape Your Rolls
Divide the kneaded dough into 12 equal portions using a scale if possible for accuracy. Shape each piece into a smooth ball by pinching the seam underneath tightly. Place them seam-side down into your prepared pan—this helps keep their shape as they rise!
Step 6: Let Them Rise
Cover the pan with plastic wrap or a clean kitchen towel and place it somewhere warm to rise until doubled in size—this should take about 1-2 hours. Just imagine how fluffy they will be!
Step 7: Bake These Beauties
Preheat your oven to 350°F (180°C). Once risen, brush each roll with beaten egg wash for that beautiful shine. Bake for about 20-30 minutes until they’re golden brown on top.
Step 8: Finish with Garlic Butter
While those rolls are baking, prepare more garlic butter by melting additional unsalted butter and cooking minced garlic just like before. After pulling out those glorious rolls from the oven, brush them generously with this buttery goodness while they’re still hot! Finish off with flaky sea salt if desired.
Now gather around the table and enjoy these delightful Garlic Bread Rolls warm from the oven!
Pro Tips for Making Garlic Bread Rolls
Making garlic bread rolls can be a delightful experience, and with these tips, you’ll be on your way to baking perfection!
-
Use fresh ingredients: Fresh garlic and herbs will enhance the flavor of your rolls significantly. Dried alternatives can work in a pinch, but nothing beats the vibrant taste of fresh garlic and parsley.
-
Knead until smooth: Ensure that you knead the dough until it is soft and tacky. This helps develop the gluten structure, giving your rolls that fluffy texture we all love. If it feels too sticky, don’t hesitate to add a bit more flour gradually!
-
Warm rising environment: Letting the dough rise in a warm area will speed up fermentation, resulting in light and airy rolls. If your kitchen is cool, consider placing the dough in an oven set to its lowest temperature for a few minutes or near a sunny window.
-
Don’t skip the egg wash: Brushing the rolls with an egg wash before baking gives them a beautiful golden-brown color and adds a slight sheen. It’s all about that presentation!
-
Serve immediately: Garlic bread rolls are best enjoyed fresh out of the oven. If you can, serve them warm for maximum flavor and texture – they’re simply irresistible this way!
How to Serve Garlic Bread Rolls
Garlic bread rolls are versatile and can complement various meals or stand alone as an appetizer. Here are some ideas on how to present this delicious dish.
Garnishes
- Chopped chives: Fresh chives add a mild onion flavor and a pop of color that enhances both aesthetics and taste.
- Grated Parmesan cheese: A sprinkle of dairy-free Parmesan or nutritional yeast just before serving can add depth without overpowering the garlic flavor.
- Crushed red pepper flakes: For those who enjoy some heat, a dash of crushed red pepper gives an exciting kick that contrasts beautifully with the buttery rolls.
Side Dishes
- Mixed Green Salad: A light salad with seasonal greens tossed in a lemon vinaigrette offers a refreshing balance to the rich garlic flavors of the rolls.
- Vegetable Soup: Pair your garlic bread rolls with a hearty vegetable soup for a comforting meal that’s perfect for chilly evenings.
- Pasta Primavera: This colorful pasta dish filled with fresh veggies provides a delightful contrast to the soft texture of garlic rolls while enhancing their herbaceous notes.
- Roasted Vegetables: Seasoned roasted vegetables bring out natural sweetness and earthy flavors that complement the garlicky goodness perfectly.
Enjoy your homemade garlic bread rolls with these serving suggestions, and watch as they become a favorite at your table!
Make Ahead and Storage
Garlic bread rolls are perfect for meal prep and can easily be made ahead of time. Whether you’re planning for a busy week or hosting a dinner party, these rolls will save you time while still offering that fresh-baked goodness!
Storing Leftovers
- Store leftover rolls in an airtight container at room temperature for up to 2 days.
- For longer storage, refrigerate them in an airtight container for up to a week.
- Reheat them in the oven or microwave before serving to restore their fluffy texture.
Freezing
- Allow the garlic bread rolls to cool completely before freezing.
- Place them in a single layer on a baking sheet and freeze until solid.
- Once frozen, transfer the rolls to a freezer-safe bag or container. They can be frozen for up to 3 months.
Reheating
- To reheat frozen rolls, preheat your oven to 350°F (180°C).
- Place the rolls on a baking sheet and cover with foil to prevent browning.
- Heat for about 15-20 minutes until warmed through. You can brush them with a little melted garlic butter for extra flavor!
FAQs
Here are some common questions you might have about making garlic bread rolls.
Can I use whole wheat flour for Garlic Bread Rolls?
Yes, you can substitute part of the all-purpose flour with whole wheat flour. Start with half and see how it affects the texture and flavor.
How do I make Garlic Bread Rolls without eggs?
You can replace the egg in this recipe with a flaxseed egg (1 tablespoon ground flaxseed mixed with 2.5 tablespoons water) or simply omit it. The rolls will still turn out delicious!
Can I make these Garlic Bread Rolls ahead of time?
Absolutely! You can prepare the dough, shape it into rolls, and let them rise before refrigerating overnight. Just bake them fresh when you’re ready!
What should I serve with Garlic Bread Rolls?
These flavorful rolls pair well with pasta dishes, soups, or salads. They’re also great as a snack on their own!
Final Thoughts
I hope you enjoy making these delightful garlic bread rolls! There’s something so comforting about warm, buttery bread fresh from the oven. As you savor each bite, may it bring warmth and joy to your table. Don’t hesitate to share your experience; I’d love to hear how they turned out for you!
Dinner
Garlic Bread Rolls
Garlic Bread Rolls are the ultimate comfort food, perfect for cozy dinners or festive gatherings. These soft, fluffy rolls are infused with aromatic garlic and fresh herbs, delivering a mouthwatering experience that will fill your kitchen with warmth and joy. With their golden crust and buttery finish, they make a delightful side dish for pasta, soups, or even stand alone as a savory snack. Easy to prepare and adaptable to various flavors, these rolls will quickly become a beloved staple in your meal rotation.
- Prep Time: 20 minutes
- Cook Time: 30 minutes
- Total Time: 50 minutes
- Yield: Makes approximately 12 rolls 1x
- Category: Side Dish
- Method: Baking
- Cuisine: American
Ingredients
- 4 1/2 tablespoons unsalted butter
- 2 tablespoons minced garlic
- 3 1/2 cups + 1 tablespoon all-purpose flour
- 3 tablespoons chopped fresh parsley
- 1 tablespoon granulated sugar
- 2 1/4 teaspoons instant yeast
- 1 teaspoon fine sea salt
- 1 cup whole or 2% milk (warmed to 110°F)
- 1 large egg (room temperature)
Instructions
- Prepare your baking pan by lightly buttering it.
- Create garlic butter by melting unsalted butter in a small pot, adding minced garlic until fragrant, then letting it cool.
- In a stand mixer bowl, combine flour, parsley, sugar, yeast, and salt.
- Add warmed milk, egg, and cooled garlic butter; knead into a smooth dough (10-12 minutes).
- Shape the dough into 12 balls and place them seam-side down in the pan.
- Cover and let rise until doubled (1-2 hours).
- Preheat oven to 350°F (180°C). Brush rolls with beaten egg wash before baking for about 20-30 minutes until golden brown.
- Brush with additional melted garlic butter after baking.
Nutrition
- Serving Size: 1 roll (90g)
- Calories: 270
- Sugar: 1g
- Sodium: 210mg
- Fat: 8g
- Saturated Fat: 5g
- Unsaturated Fat: 3g
- Trans Fat: 0g
- Carbohydrates: 41g
- Fiber: 2g
- Protein: 7g
- Cholesterol: 40mg