Cheesecake Stuffed Apples: A Delicious Twist on a Classic Dessert
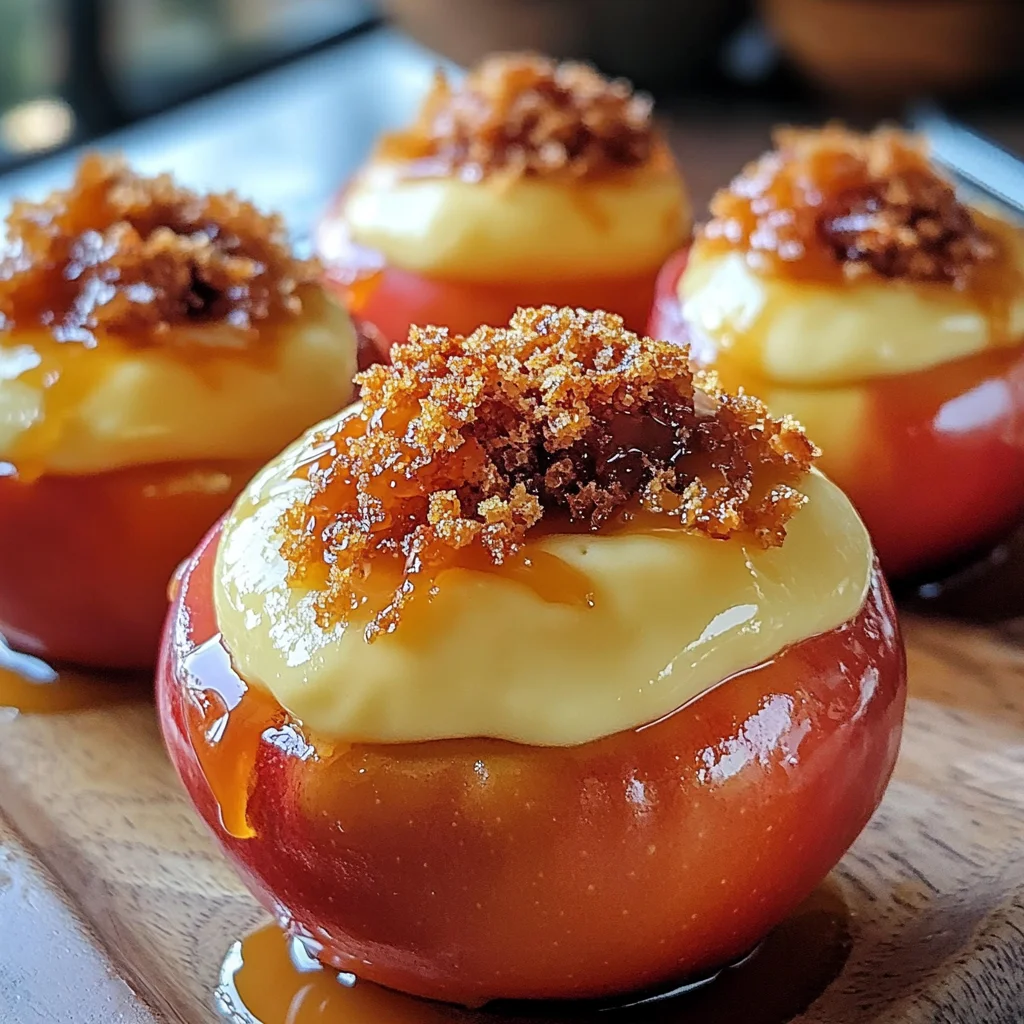
If you’re looking for a dessert that feels like a warm hug on a chilly evening, you’ve come to the right place! These Cheesecake Stuffed Apples: A Delicious Twist on a Classic Dessert are a delightful combination of sweet, creamy filling and tender baked apples. They’re not just delicious; they’re also simple enough to whip up on busy weeknights yet elegant enough for family gatherings or special occasions.
What I love most about this recipe is how it brings together two beloved treats: cheesecake and baked apples. It’s the perfect way to satisfy that sweet tooth while enjoying the comforting flavors of fall, no matter what season it is!
Why You’ll Love This Recipe
- Easy to Make: This recipe comes together quickly, making it perfect for both novice bakers and seasoned pros.
- Family-Friendly: Kids love helping fill the apples with the creamy cheesecake mixture, making it a fun family activity.
- Make-Ahead Option: You can prepare these apples in advance and bake them just before serving, saving time on busy days.
- Deliciously Versatile: Feel free to customize the toppings and fillings to suit your taste!
- Perfectly Cozy: Warm baked apples topped with caramel sauce create a comforting dessert that everyone will adore.
Ingredients You’ll Need
Let’s gather our simple, wholesome ingredients for these delightful Cheesecake Stuffed Apples. You probably have most of these in your kitchen already!
- 4 medium-sized apples (Granny Smith or Honeycrisp)
- 8 oz cream cheese, softened
- 1/2 cup granulated sugar
- 1/4 cup brown sugar
- 1 tsp vanilla extract
- 1/2 tsp ground cinnamon
- 1/4 tsp salt
- 1/2 cup sour cream
- 1/2 cup crushed graham crackers
- 1/4 cup chopped nuts (optional, walnuts or pecans)
- 1/4 cup caramel sauce (for drizzling)
- 1 tbsp lemon juice (to prevent browning of apples)
Variations
One of the best things about this recipe is its flexibility! You can easily adapt it to suit your preferences or dietary needs.
- Swap the nuts: If you have nut allergies, feel free to leave out the chopped nuts or replace them with seeds like pumpkin or sunflower seeds.
- Change up the fruit: Try using pears instead of apples for a different flavor profile.
- Add chocolate: Mix in some mini chocolate chips into the cheesecake filling for an extra treat.
- Switch the toppings: Instead of caramel sauce, drizzle with melted dark chocolate or a berry compote for a fresh twist.
How to Make Cheesecake Stuffed Apples: A Delicious Twist on a Classic Dessert
Step 1: Preheat Your Oven
Begin by preheating your oven to 350°F (175°C). This ensures that your apples will bake evenly and reach that perfect tender texture.
Step 2: Prepare the Apples
Wash your apples thoroughly under cold water and pat them dry. Carefully remove the core from each apple, but be sure to leave the bottom intact! This creates a lovely little cavity for all that delicious cheesecake filling. Drizzling lemon juice inside each apple helps prevent browning and keeps them looking fresh.
Step 3: Make the Cheesecake Filling
In a large mixing bowl, combine softened cream cheese and granulated sugar. Beat on medium speed until smooth and creamy—this usually takes about 2-3 minutes. Then add brown sugar, vanilla extract, ground cinnamon, and salt. Mixing these ingredients well will ensure every bite is bursting with flavor.
Step 4: Add Sour Cream
Next, add in sour cream and mix until fully combined. This ingredient adds richness and depth to your filling!
Step 5: Fold in Crunchy Goodness
Gently fold in crushed graham crackers and any chopped nuts you choose to use. The graham crackers give a lovely crunch reminiscent of traditional cheesecake crusts.
Step 6: Fill Those Apples!
Now it’s time to fill each apple with that luscious cheesecake mixture! Use a spoon or piping bag to pack the filling gently but firmly into each apple.
Step 7: Bake Your Creation
Place the filled apples upright in a baking dish. If there’s any extra filling, spoon it around the apples—it’s too good not to use! Cover your baking dish with aluminum foil to keep everything nice and moist during baking. Bake for about 25-30 minutes until your apples are tender but still hold their shape.
Step 8: Brown It Up!
Remove the foil from your baking dish and bake for an additional 10-15 minutes. This step gives your stuffed apples that beautiful golden-brown top we all love!
Step 9: Cool Down & Serve
Allow your Cheesecake Stuffed Apples to cool for about ten minutes before serving. Drizzle them generously with caramel sauce and sprinkle some extra cinnamon if you like. For an added touch of indulgence, serve warm with vanilla ice cream or whipped cream!
Step 10: Store Leftovers
If you happen to have any leftovers (which is rare!), let them cool completely before storing them in an airtight container in the refrigerator.
I hope you enjoy making these Cheesecake Stuffed Apples as much as I do! They truly are a delicious twist on classic desserts that will warm hearts around your table. Enjoy every bite!
Pro Tips for Making Cheesecake Stuffed Apples: A Delicious Twist on a Classic Dessert
Creating the perfect Cheesecake Stuffed Apples can be a delightful experience, and these tips will help you achieve a delicious outcome every time!
-
Choose the right apples: Opt for tart varieties like Granny Smith or Honeycrisp. Their firmness holds up well during baking and provides a nice contrast to the sweet cheesecake filling.
-
Soften the cream cheese properly: Make sure your cream cheese is at room temperature for easy mixing. This ensures a smooth, creamy texture that blends seamlessly with the other ingredients.
-
Pack the filling tightly: When filling your apples, make sure to pack in the cheesecake mixture gently but firmly. This helps prevent any gaps and ensures each bite is packed with flavor.
-
Keep an eye on baking time: Ovens can vary, so check your apples periodically. You want them tender but not mushy; this keeps them from falling apart when served.
-
Experiment with flavors: Feel free to add different spices or flavor extracts to the cheesecake filling. A pinch of nutmeg or a splash of almond extract can add an exciting twist to this classic dessert.
How to Serve Cheesecake Stuffed Apples: A Delicious Twist on a Classic Dessert
Presenting your Cheesecake Stuffed Apples beautifully can make them even more enticing! Here are some fun ideas for serving this delicious dessert.
Garnishes
- Whipped coconut cream: A dollop of whipped coconut cream adds a light, airy touch that complements the richness of the cheesecake filling perfectly.
- Chopped nuts: Sprinkle some extra chopped walnuts or pecans on top for added crunch and flavor contrast.
- Cinnamon dusting: A light dusting of ground cinnamon enhances the warm flavors and gives your dish an appealing finishing touch.
Side Dishes
- Vanilla ice cream: The creamy coldness of vanilla ice cream pairs wonderfully with warm apples, creating a delightful contrast in temperatures.
- Caramel sauce drizzle: Extra caramel sauce drizzled over the apples adds sweetness and enhances their presentation.
- Fresh berries: Serve with a side of fresh berries like raspberries or blueberries for a burst of color and freshness that cuts through the richness of the dessert.
- Herbal tea: A warm cup of herbal tea makes for a soothing beverage choice that balances out the sweetness of your Cheesecake Stuffed Apples perfectly.
With these serving suggestions and pro tips, you’ll create an unforgettable dessert experience that everyone will love! Enjoy every bite!
Make Ahead and Storage
These Cheesecake Stuffed Apples are not only a delightful treat but also perfect for meal prep! You can prepare them in advance, making them an excellent choice for gatherings or weeknight desserts.
Storing Leftovers
- Allow any leftover stuffed apples to cool completely.
- Place the apples in an airtight container.
- Store them in the refrigerator for up to 3 days.
Freezing
- If you want to make these ahead of time, you can freeze the unbaked stuffed apples.
- Wrap each apple individually in plastic wrap and then place them in a freezer-safe bag.
- They can be frozen for up to 2 months. When ready to use, thaw overnight in the refrigerator.
Reheating
- To reheat baked apples, preheat your oven to 350°F (175°C).
- Place the apples in a baking dish and cover with foil to prevent drying out.
- Warm them for about 15-20 minutes until heated through.
FAQs
Here are some common questions about this delicious dessert!
Can I use different types of apples for Cheesecake Stuffed Apples?
Absolutely! While Granny Smith and Honeycrisp are great choices due to their firmness and tartness, feel free to experiment with your favorite varieties like Fuji or Braeburn.
How long do Cheesecake Stuffed Apples last?
When stored properly in the refrigerator, Cheesecake Stuffed Apples can last up to 3 days. If you want to enjoy them later, freezing is a great option!
Can I make Cheesecake Stuffed Apples without cream cheese?
You can try using a non-dairy cream cheese alternative if you prefer. This will still give you that creamy texture while catering to dietary preferences.
What toppings can I add to my Cheesecake Stuffed Apples?
Feel free to get creative! Besides caramel sauce, you could drizzle melted chocolate or add a sprinkle of crushed cookies or nuts on top before serving for extra flavor and texture.
Final Thoughts
I hope you find joy in creating these Cheesecake Stuffed Apples! This recipe brings together comforting flavors and textures that are sure to impress friends and family alike. It’s a wonderful way to enjoy a classic dessert with a unique twist. Happy baking, and don’t forget to share your delicious results!
Cheesecake Stuffed Apples: A Delicious Twist on a Classic Dessert
Indulge in the warmth and comfort of Cheesecake Stuffed Apples, a delightful twist on a classic dessert! These tender baked apples are filled with a creamy cheesecake mixture that combines cream cheese, sugars, and aromatic spices for a rich flavor. Topped with caramel sauce, this dessert is not only simple to prepare but also perfect for any occasion—whether it’s a cozy family dinner or a festive gathering. With the flexibility to customize toppings and fillings, these stuffed apples are sure to satisfy your sweet tooth while embracing the comforting flavors of fall all year round.
- Prep Time: 20 minutes
- Cook Time: 45 minutes
- Total Time: 1 hour 5 minutes
- Yield: Serves 4
- Category: Dessert
- Method: Baking
- Cuisine: American
Ingredients
- 4 medium-sized apples (Granny Smith or Honeycrisp)
- 8 oz cream cheese, softened
- 1/2 cup granulated sugar
- 1/4 cup brown sugar
- 1 tsp vanilla extract
- 1/2 cup sour cream
- 1/2 cup crushed graham crackers
- 1/4 cup chopped nuts (optional, walnuts or pecans)
- 1/4 cup caramel sauce (for drizzling)
- 1 tbsp lemon juice
Instructions
- Preheat your oven to 350°F (175°C).
- Wash and core the apples, leaving the bottoms intact, then drizzle with lemon juice.
- In a bowl, mix cream cheese and sugars until smooth. Add vanilla and sour cream, mixing well.
- Gently fold in crushed graham crackers.
- Fill each apple with the cheesecake mixture and place them in a baking dish.
- Cover with foil and bake for 25-30 minutes, then uncover and bake for an additional 10-15 minutes until golden brown.
- Allow to cool slightly before serving with caramel sauce drizzled on top.
Nutrition
- Serving Size: 1 stuffed apple (150g)
- Calories: 290
- Sugar: 30g
- Sodium: 180mg
- Fat: 13g
- Saturated Fat: 8g
- Unsaturated Fat: 5g
- Trans Fat: 0g
- Carbohydrates: 42g
- Fiber: 3g
- Protein: 4g
- Cholesterol: 30mg