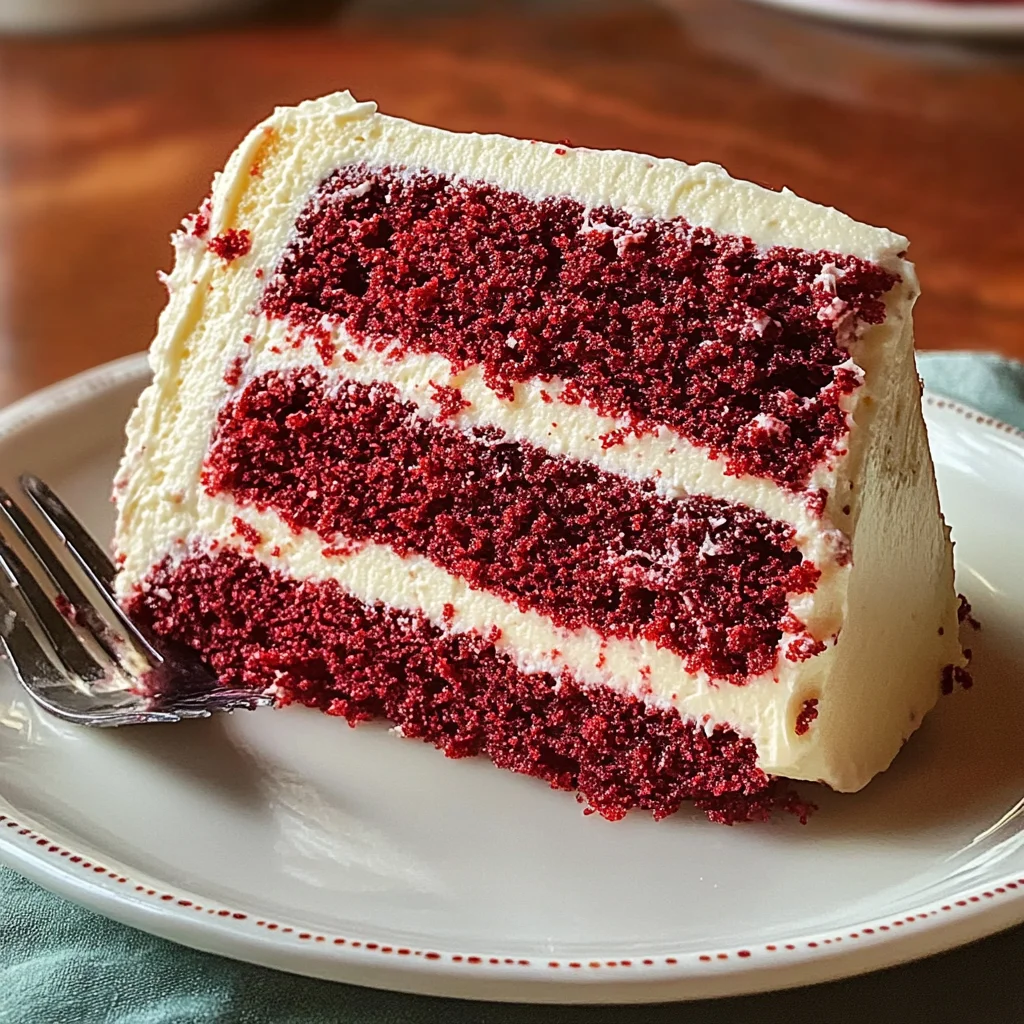
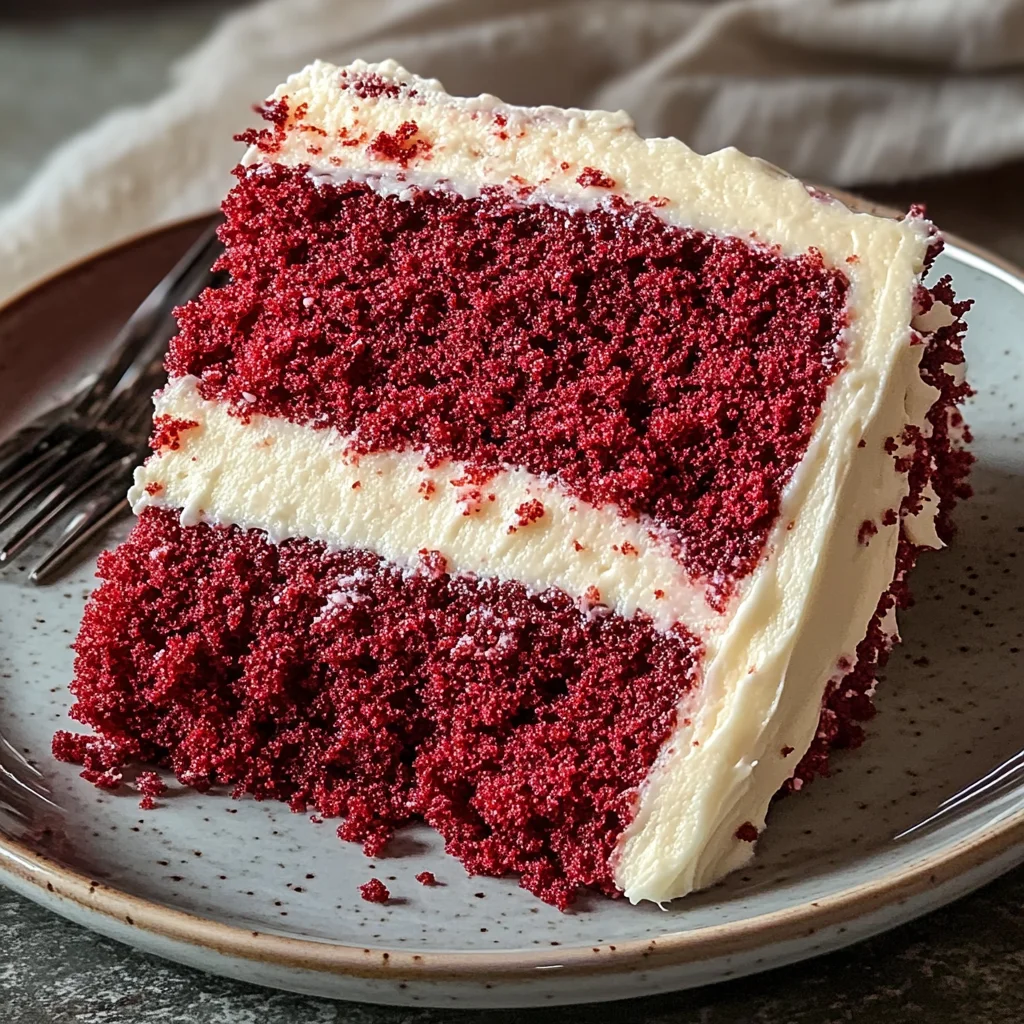
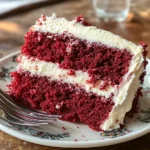
Red Velvet Cake
If you’re looking for a dessert that turns heads and warms hearts, you’ve come to the right place! This Red Velvet Cake is not just a feast for the eyes with its stunning hue; it’s also a delightful treat that combines rich flavors and a velvety texture. Whether you’re celebrating a birthday, hosting a family gathering, or simply craving something sweet after dinner, this cake is perfect for any occasion. Its unique blend of chocolatey sweetness with a hint of buttermilk tang makes it truly special.
I love making this cake for my loved ones because it brings everyone together. The creamy frosting adds the perfect finishing touch, making each slice irresistible. Trust me; once you try this Red Velvet Cake, it will become a staple in your dessert repertoire!
Why You’ll Love This Recipe
- Easy to make: With simple steps and straightforward ingredients, even beginner bakers can whip up this beauty without stress.
- Family-friendly appeal: Kids and adults alike adore the vibrant color and delicious taste of this cake.
- Perfect for any occasion: Birthdays, holidays, or just a cozy night in—this cake fits every celebration beautifully.
- Make-ahead convenience: Bake it ahead of time and frost it later for an easy dessert solution when entertaining guests.
Ingredients You’ll Need
To create this scrumptious Red Velvet Cake, you’ll need some simple and wholesome ingredients that are likely already in your pantry. Let’s gather what you need:
- 2 ½ cups all-purpose flour
- 1 ½ cups granulated sugar
- 1 tsp baking soda
- 1 tsp salt
- 1 cup vegetable oil
- 1 cup buttermilk
- 2 large eggs
- 2 tbsp unsweetened cocoa powder
- 1 oz red food coloring (gel)
- 2 tsp vanilla extract
- Cream cheese frosting (for topping)
Variations
One of the best things about this recipe is its flexibility! Feel free to get creative and put your own spin on this classic dessert. Here are some fun variations to try:
- Add nuts: Chopped walnuts or pecans can add a delightful crunch to your cake layers.
- Make it gluten-free: Substitute all-purpose flour with a gluten-free blend to cater to dietary needs without sacrificing flavor.
- Try different frostings: Instead of cream cheese frosting, use whipped coconut cream for a lighter touch.
- Incorporate flavors: Add espresso powder or cinnamon for an exciting twist on the traditional recipe.
How to Make Red Velvet Cake
Step 1: Preheat Your Oven
Start by preheating your oven to 350°F (175°C) and greasing two round baking pans. This step is crucial because it ensures that your cakes bake evenly and come out easily once they’re done.
Step 2: Mix Dry Ingredients
In a bowl, whisk together the flour, cocoa powder, baking soda, and salt. This helps distribute the dry ingredients evenly, ensuring your cake has consistent flavor and texture throughout.
Step 3: Combine Wet Ingredients
In another bowl, mix the sugar and vegetable oil until smooth. Adding eggs one at a time allows each one to fully incorporate into the mixture before moving on. Then stir in buttermilk, red food coloring, and vanilla extract; these ingredients bring that signature flavor and stunning color!
Step 4: Combine Wet and Dry Mixtures
Gradually add the dry ingredients to the wet mixture until just combined—remember not to overmix! This helps maintain that tender crumb we all love in a good cake.
Step 5: Bake Your Cakes
Divide the batter between the prepared pans and bake for about 25-30 minutes or until a toothpick inserted comes out clean. The wonderful aroma filling your kitchen will be hard to resist!
Step 6: Cool and Frost
Once baked, allow the cakes to cool completely before generously frosting with cream cheese frosting. This cooling step is essential; frosting on warm cake can lead to melting messes instead of beautiful layers.
And there you have it—a delightful Red Velvet Cake ready to impress! Enjoy every slice with friends or family—or keep it all to yourself!
Pro Tips for Making Red Velvet Cake
Making the perfect Red Velvet Cake is all about attention to detail, and these tips will help you achieve that show-stopping result!
-
Use gel food coloring: Gel food coloring provides a more vibrant hue compared to liquid versions and won’t alter the cake’s consistency. This ensures your cake has that iconic red color without compromising texture.
-
Sift the dry ingredients: Sifting your flour and cocoa powder helps to aerate them, leading to a lighter cake. This small step can significantly improve the overall fluffiness of your red velvet layers.
-
Let the cake cool completely: Allowing your cakes to cool completely before frosting is crucial. If you frost while the cakes are still warm, the frosting may melt, making it difficult to achieve that beautiful finish.
-
Use high-quality cream cheese for frosting: A rich, creamy frosting enhances the overall flavor of your cake. Opting for a good quality cream cheese will provide that tangy sweetness that’s essential in complementing the chocolate notes of the cake.
-
Layer generously: When frosting between layers and on top, be generous! A thick layer of cream cheese frosting not only tastes amazing but also adds to the visual appeal of your dessert.
How to Serve Red Velvet Cake
Serving Red Velvet Cake can be as delightful as making it! Here are some presentation ideas that will make your cake truly shine at any gathering.
Garnishes
- Fresh berries: Adding strawberries or raspberries on top of each slice provides a pop of color and a fruity contrast to the rich cake.
- Chopped nuts: Sprinkling crushed walnuts or pecans on top lends a nice crunch and complements the creamy frosting beautifully.
Side Dishes
- Coffee: A warm cup of coffee pairs wonderfully with red velvet cake, highlighting its rich flavors while providing a comforting balance.
- Vanilla ice cream: The creamy sweetness of vanilla ice cream contrasts perfectly with the tangy cream cheese frosting and makes for a delightful combination.
- Fruit salad: A light fruit salad made with seasonal fruits cuts through the richness of the cake and adds a refreshing element to your dessert spread.
- Chocolate mousse: For chocolate lovers, serving a small portion of chocolate mousse alongside red velvet cake creates an indulgent duo that’s hard to resist.
Now that you have all these tips and serving suggestions, you’re ready to impress everyone with your homemade Red Velvet Cake! Enjoy every bite!
Make Ahead and Storage
This Red Velvet Cake is perfect for meal prep, allowing you to indulge in deliciousness at your convenience. Whether you’re planning a party or just want to have a sweet treat on hand, this cake can be made ahead of time and stored for later enjoyment.
Storing Leftovers
- Allow the cake to cool completely before storing.
- Place any leftover slices in an airtight container.
- Keep the container in the refrigerator for up to 5 days.
- For best results, add a layer of plastic wrap before sealing.
Freezing
- Slice the cake into individual pieces or freeze the entire cake.
- Wrap each slice or the whole cake tightly in plastic wrap, then foil.
- Label with the date and store in the freezer for up to 3 months.
- To thaw, place in the refrigerator overnight before serving.
Reheating
- If frozen, thaw slices in the refrigerator as mentioned above.
- For a warm slice, place it on a microwave-safe plate.
- Heat in the microwave for about 10-15 seconds until just warmed through.
FAQs
Here are some common questions you might have about making this delightful Red Velvet Cake.
What makes Red Velvet Cake different from regular chocolate cake?
Red Velvet Cake features a unique combination of cocoa powder and buttermilk that gives it a distinct flavor profile and a beautiful red color. The tanginess from buttermilk balances perfectly with its sweetness, setting it apart from regular chocolate cake.
Can I use food coloring alternatives for Red Velvet Cake?
Yes! If you prefer natural options, you can use beet juice or pomegranate juice as alternatives to achieve that signature red hue. However, remember that these may slightly alter the flavor of your cake.
How long does homemade Red Velvet Cake last?
When stored properly in an airtight container in the fridge, homemade Red Velvet Cake can last up to 5 days. If frozen, it maintains its quality for about 3 months.
Final Thoughts
I hope you find joy in baking this stunning Red Velvet Cake! It’s not just about taste; it’s about creating memories with every slice you serve. Whether celebrating a special occasion or simply treating yourself, this recipe is sure to impress. Enjoy every moment of making and sharing this delightful dessert!
Red Velvet Cake
Indulge in the delight of a homemade Red Velvet Cake, a dessert that masterfully blends rich flavors and an eye-catching hue. This velvety cake is perfect for any celebration, whether it’s a birthday party or a cozy family gathering. The unique combination of cocoa powder and buttermilk creates a tender crumb, while the luscious cream cheese frosting adds a creamy finish to each slice. Easy to make and family-friendly, this recipe is sure to become a favorite among both kids and adults alike. Gather your loved ones around this stunning cake, and enjoy every delicious moment!
- Prep Time: 20 minutes
- Cook Time: 30 minutes
- Total Time: 50 minutes
- Yield: Approximately 12 servings 1x
- Category: Dessert
- Method: Baking
- Cuisine: American
Ingredients
- 2 ½ cups all-purpose flour
- 1 ½ cups granulated sugar
- 1 tsp baking soda
- 1 tsp salt
- 1 cup vegetable oil
- 1 cup buttermilk
- 2 large eggs
- 2 tbsp unsweetened cocoa powder
- 1 oz red food coloring (gel)
- 2 tsp vanilla extract
- Cream cheese frosting (for topping)
Instructions
- Preheat your oven to 350°F (175°C) and grease two round baking pans.
- In a bowl, whisk together the flour, cocoa powder, baking soda, and salt.
- In another bowl, mix the sugar and vegetable oil until smooth. Add eggs one at a time, then stir in buttermilk, red food coloring, and vanilla extract.
- Gradually combine the dry ingredients with the wet mixture until just mixed.
- Divide the batter between the prepared pans and bake for about 25-30 minutes or until a toothpick inserted comes out clean.
- Let the cakes cool completely before frosting with cream cheese frosting.
Nutrition
- Serving Size: 1 slice (100g)
- Calories: 360
- Sugar: 30g
- Sodium: 300mg
- Fat: 20g
- Saturated Fat: 3g
- Unsaturated Fat: 15g
- Trans Fat: 0g
- Carbohydrates: 40g
- Fiber: 1g
- Protein: 4g
- Cholesterol: 30mg