Halloween Mini Pizzas
If you’re looking for a fun and easy way to celebrate Halloween, these Halloween Mini Pizzas are just the ticket! They’re not only delicious but also bring a delightful spooky twist to your table. This recipe is perfect for busy weeknights, family gatherings, or even a fun afternoon snack with the kids. You can get creative with toppings and shapes, making it a fantastic opportunity for some family bonding in the kitchen.
These mini pizzas are sure to be a hit at any Halloween party or festive dinner. Plus, they’re simple enough that even the little ones can help out! Let’s dive into why you’ll love making these Halloween Mini Pizzas.
Why You’ll Love This Recipe
- Super Easy to Make: With just a few simple steps, you’ll have delicious mini pizzas ready in no time. Perfect for when time is tight!
- Family-Friendly Fun: Kids will love helping decorate their own pizzas. It’s a fun way to get them involved in cooking!
- Versatile Toppings: Use whatever toppings you have on hand. The possibilities are endless, making this recipe adaptable for everyone’s taste.
- Great for Parties: These spooky treats are perfect for Halloween gatherings. They look adorable and taste amazing!
- Make Ahead Convenience: Prep the ingredients ahead of time to make assembly a breeze when guests arrive.
Ingredients You’ll Need
This recipe uses simple and wholesome ingredients that you might already have in your pantry. Let’s check out what you need to whip up these fun Halloween Mini Pizzas!
For the Pizzas
- 8 mini pizza crusts (store-bought or homemade)
- 1 cup pizza sauce
- 2 cups shredded mozzarella cheese
- 8 slices mozzarella cheese (for ghost shapes)
- 12 slices turkey pepperoni
- 1 small black olive (sliced for eyes)
- 1 orange bell pepper (cut into pumpkin shapes)
Variations
Feel free to get creative with this recipe! There are so many ways to make these Halloween Mini Pizzas your own. Here are a few ideas:
- Swap the protein: Try using different toppings like sliced chicken, or veggies instead of turkey pepperoni.
- Change the cheese: Experiment with other types of cheese such as cheddar or provolone for a different flavor.
- Go veggie: Load up on your favorite vegetables like bell peppers, mushrooms, or spinach for a healthier twist.
- Make them spicy: Add some jalapeños or red pepper flakes if you want to give your pizzas a kick!
How to Make Halloween Mini Pizzas
Step 1: Preheat the Oven
Start by preheating your oven to 400°F (200°C). This step ensures that our mini pizzas bake evenly and become perfectly golden and bubbly.
Step 2: Prepare the Crusts
Next, line a baking sheet with parchment paper and place your mini pizza crusts on it. Spread pizza sauce evenly over each crust—this forms the delicious base for our spooky creations.
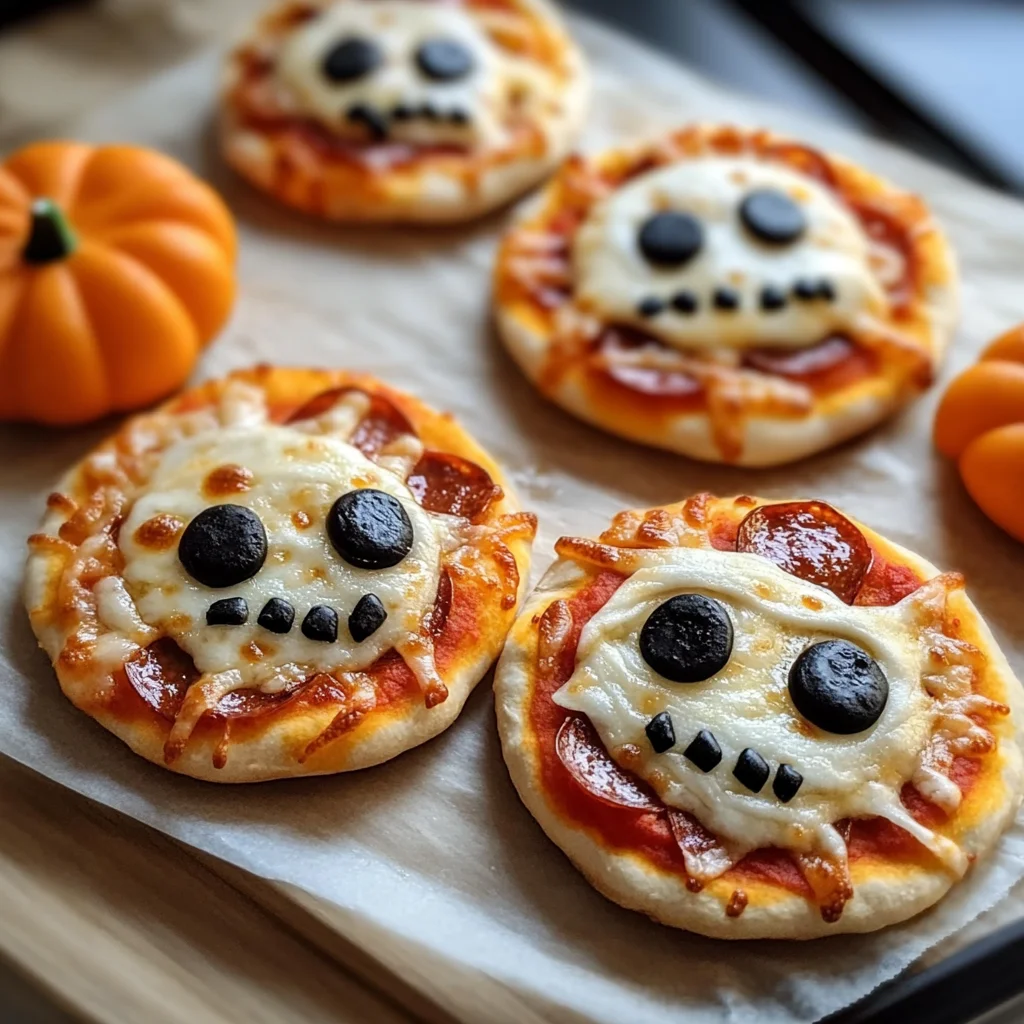
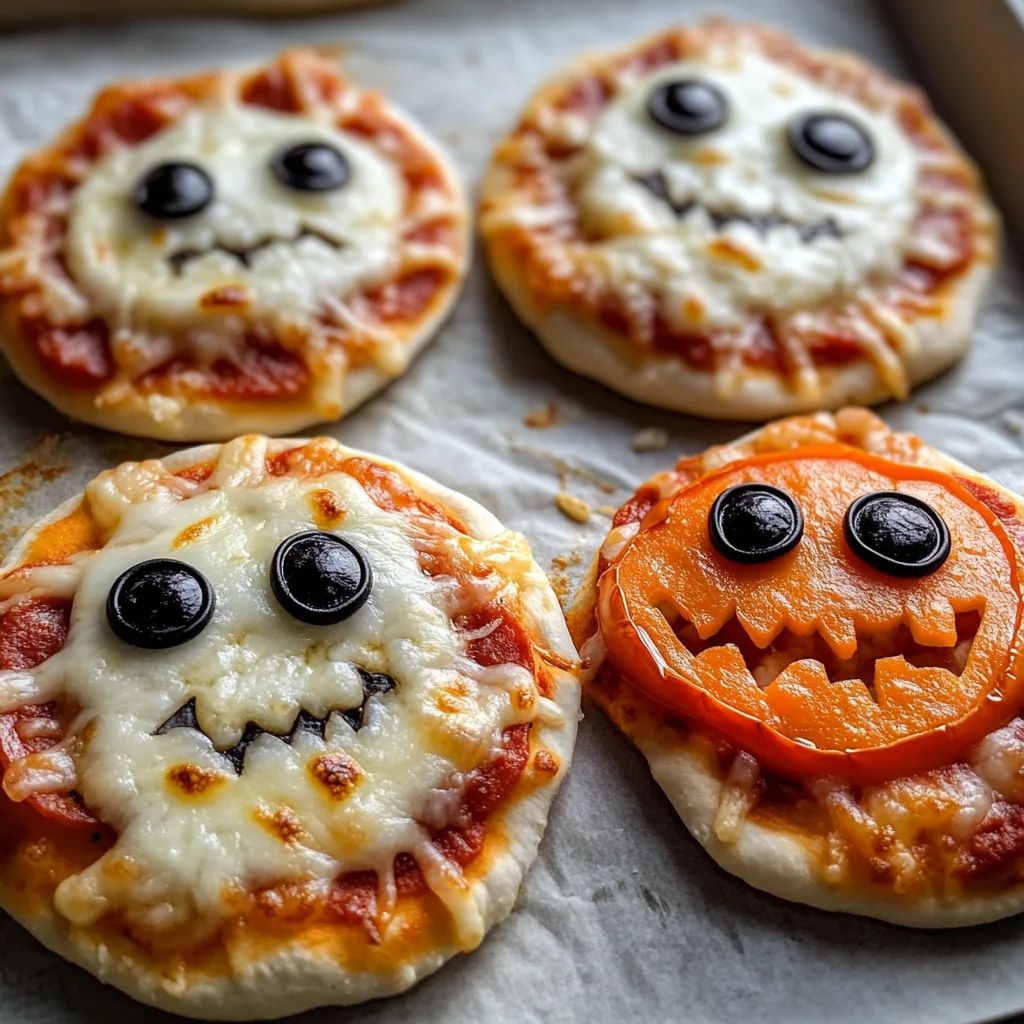
Step 3: Create Ghost Pizzas
For the ghostly faces, cut out ghost shapes from mozzarella slices. Place these on top of the sauce. Don’t forget to add sliced olives as eyes—they really bring those ghosts to life!
Step 4: Assemble Mummy Pizzas
For mummy-themed pizzas, layer strips of mozzarella cheese over the sauce in a criss-cross pattern. Again, use olive slices for eyes to give them character!
Step 5: Craft Jack-O’-Lantern Pizzas
Top your remaining pizzas with shredded cheese and arrange orange bell pepper slices into silly jack-o’-lantern faces. These will surely be a crowd-pleaser!
Step 6: Bake Them Up
Bake all your mini pizzas in the oven for about 8-10 minutes or until the cheese is melted and bubbly and the crust has turned golden brown. The aroma will fill your kitchen with delightful scents!
Step 7: Serve & Enjoy!
Once baked, serve these warm beauties straight from the oven. Watch as everyone enjoys their spooky creations while sharing laughs—there’s nothing quite like enjoying food made with love!
Now that you have this recipe at hand, I hope you enjoy making these Halloween Mini Pizzas as much as I do! They’re sure to add some festive spirit to your celebrations!
Pro Tips for Making Halloween Mini Pizzas
Creating spooky Halloween Mini Pizzas can be a thrilling experience, especially with these handy tips to elevate your pizza-making game!
-
Choose the Right Crust: Opt for mini pizza crusts that are sturdy enough to hold toppings. This will prevent sogginess and ensure your pizzas have a delightful crunch.
-
Get Creative with Shapes: Use cookie cutters to create fun shapes from the cheese or vegetables. This adds an extra layer of spookiness and makes the pizzas visually appealing, especially for kids.
-
Layer Wisely: When adding toppings, start with sauce, then cheese, followed by additional toppings. This layering method helps keep everything in place and enhances the flavor profile.
-
Adjust Baking Time: Keep an eye on your pizzas as they bake; ovens can vary. Remove them when the cheese is bubbly and golden for that perfect melt without overcooking.
-
Involve the Kids: Letting children help decorate their own mini pizzas not only makes cooking fun but also encourages them to be adventurous eaters!
How to Serve Halloween Mini Pizzas
Presenting your Halloween Mini Pizzas in a festive way can make your gathering even more enjoyable! Here are some ideas to make serving time a treat.
Garnishes
- Fresh Basil Leaves: Add a sprinkle of fresh basil leaves on top just before serving for a pop of color and freshness.
- Chili Flakes: Provide chili flakes on the side for those who enjoy a little heat with their Halloween fun.
- Pumpkin Seeds: Sprinkle roasted pumpkin seeds around the serving platter for a crunchy texture that complements the soft pizzas.
Side Dishes
- Crispy Veggie Sticks: Carrot, celery, and cucumber sticks served with hummus offer a refreshing crunch that balances out the cheesy goodness of the mini pizzas.
- Spooky Fruit Salad: Create a fruit salad using seasonal fruits like oranges, apples, and grapes. Adding ghost-shaped cutouts from bananas can add whimsy!
- Witch’s Brew Soup: A vibrant green soup made from pureed spinach or broccoli gives a healthy option that pairs well with your pizzas while maintaining the Halloween theme.
- Mini Salad Cups: Individual cups filled with mixed greens, cherry tomatoes, and a light vinaigrette provide a colorful contrast to the pizzas and keep things fresh.
Now you’re all set to create not just delicious but also visually enticing Halloween Mini Pizzas! Enjoy this spooky culinary adventure with friends and family.
Make Ahead and Storage
These Halloween Mini Pizzas are not just fun to make, but they also work wonderfully for meal prep! You can whip them up ahead of time and enjoy them later, making your spooky celebrations even easier.
Storing Leftovers
- Store any leftover mini pizzas in an airtight container in the refrigerator.
- They will stay fresh for up to 3 days.
- Reheat in the oven or microwave before serving for the best taste.
Freezing
- Allow the mini pizzas to cool completely before freezing.
- Place them in a single layer on a baking sheet and freeze until solid, then transfer to a freezer-safe bag or container.
- They can be frozen for up to 2 months.
Reheating
- For best results, reheat mini pizzas in the oven at 375°F (190°C) for about 10 minutes or until heated through.
- Alternatively, use a microwave on medium power for 1-2 minutes if you’re short on time.
FAQs
Here are some common questions about making Halloween Mini Pizzas!
Can I customize the toppings on my Halloween Mini Pizzas?
Absolutely! Feel free to get creative with your toppings based on what you have available or your taste preferences. Just keep it spooky!
How do I make Halloween Mini Pizzas vegetarian?
You can easily make these mini pizzas vegetarian by using vegetable-based toppings like bell peppers, mushrooms, and olives instead of turkey pepperoni.
What is the best way to serve Halloween Mini Pizzas?
These mini pizzas are perfect as finger food at parties! Serve with a variety of dipping sauces like marinara or ranch for added fun.
Are Halloween Mini Pizzas kid-friendly?
Yes! Kids love getting involved in decorating their own mini pizzas. It’s a fun activity that makes mealtime exciting!
Final Thoughts
I hope you enjoy creating these delightful Halloween Mini Pizzas as much as I do! They bring a festive spirit to any gathering and are perfect for getting everyone involved in the kitchen. Have fun decorating them with your favorite toppings and share them with friends and family. Happy cooking, and may your Halloween be filled with joy and delicious treats!
[Appetizer]
Halloween Mini Pizzas

Create fun and spooky Halloween Mini Pizzas that kids will love! Perfect for parties or snacks—try this easy recipe today!
- Prep Time: 15 minutes
- Cook Time: 10 minutes
- Total Time: 25 minutes
- Yield: Makes approximately 8 servings 1x
- Category: Appetizer
- Method: Baking
- Cuisine: American
Ingredients
- 8 mini pizza crusts
- 1 cup pizza sauce
- 2 cups shredded mozzarella cheese
- 8 slices mozzarella cheese (for ghost shapes)
- 12 slices turkey pepperoni
- 1 small black olive (sliced for eyes)
- 1 orange bell pepper (cut into pumpkin shapes)
Instructions
- Preheat your oven to 400°F (200°C).
- Line a baking sheet with parchment paper and place the mini pizza crusts on it.
- Spread pizza sauce evenly over each crust.
- For ghost pizzas, cut out shapes from mozzarella slices and place them on top of the sauce with olive slices as eyes.
- For mummy pizzas, layer strips of mozzarella in a criss-cross pattern and use olive slices for eyes.
- Create jack-o'-lantern pizzas by topping with shredded cheese and arranging bell pepper slices as faces.
- Bake for about 8-10 minutes or until the cheese is melted and bubbly.
Nutrition
- Serving Size: 1 mini pizza (approximately 80g)
- Calories: 210
- Sugar: 2g
- Sodium: 420mg
- Fat: 10g
- Saturated Fat: 5g
- Unsaturated Fat: 4g
- Trans Fat: 0g
- Carbohydrates: 24g
- Fiber: 2g
- Protein: 9g
- Cholesterol: 25mg