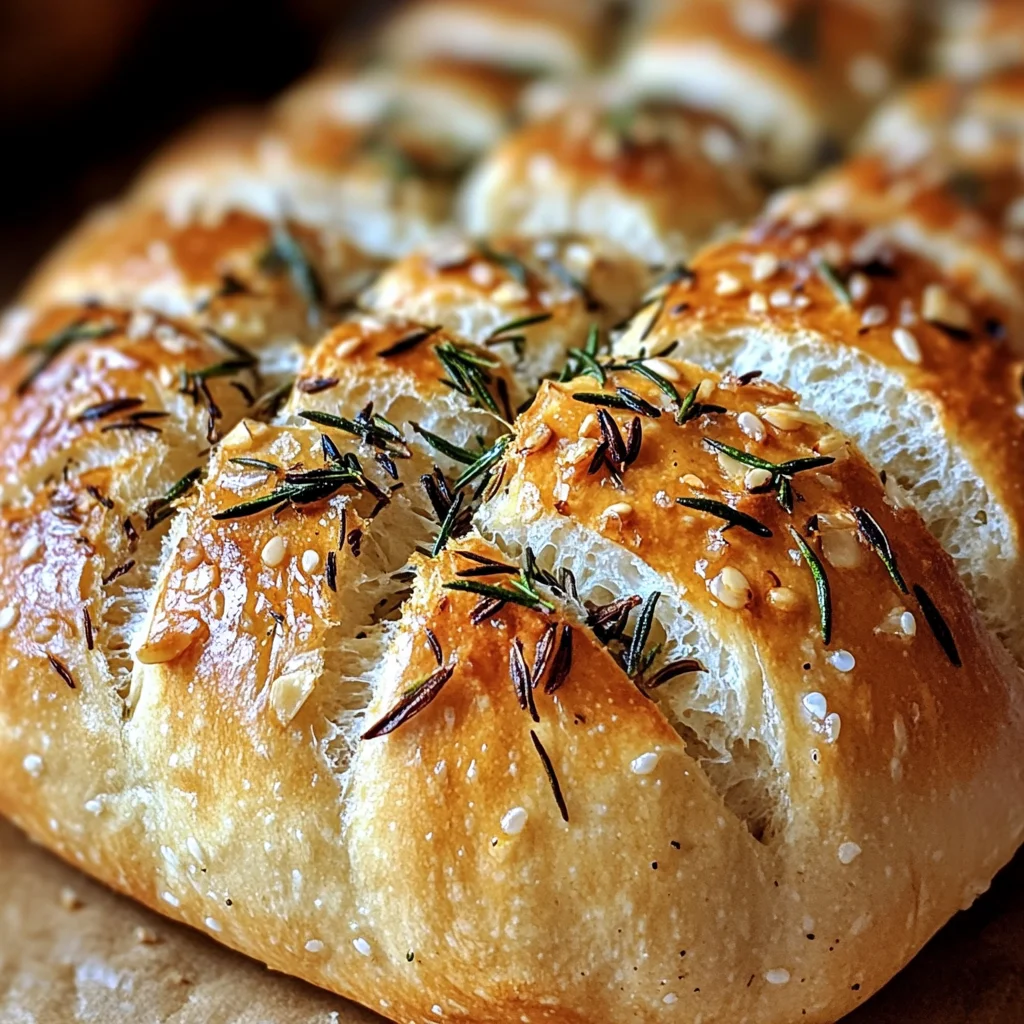
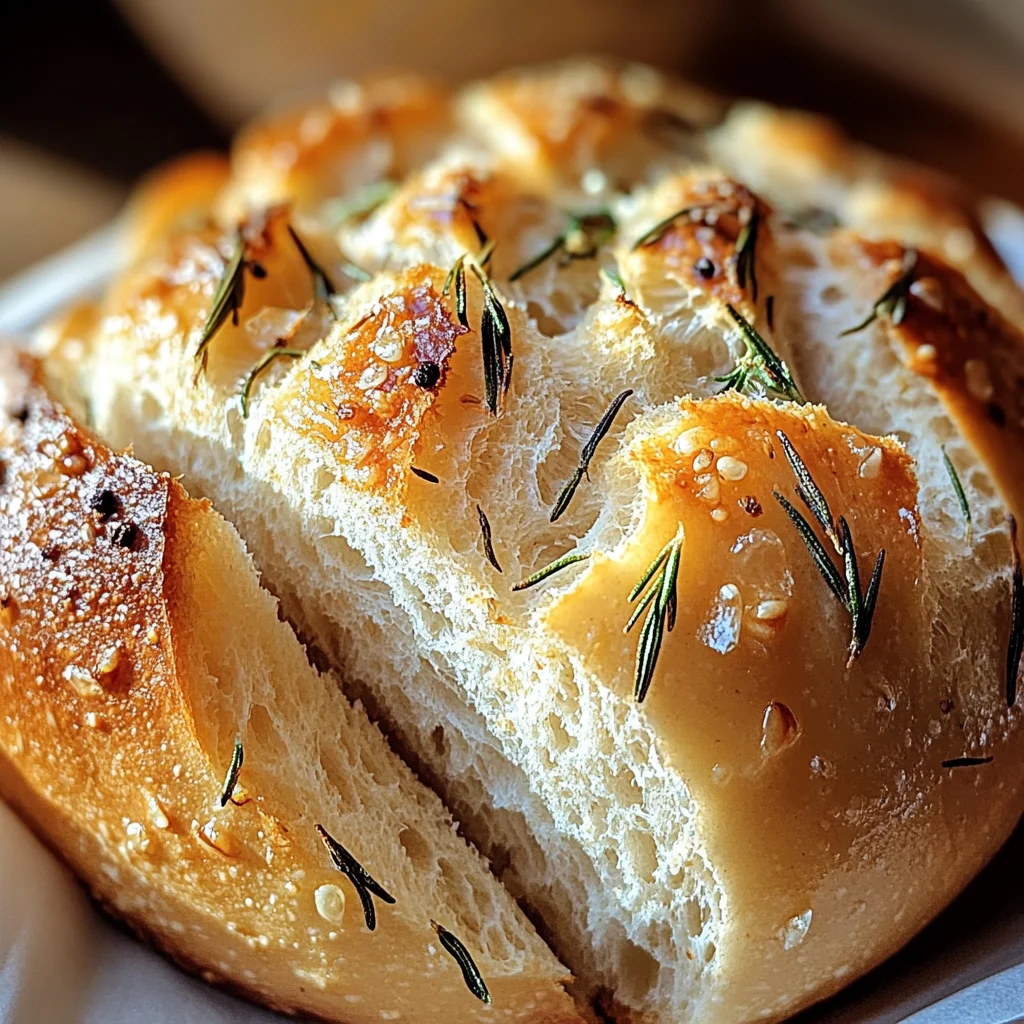
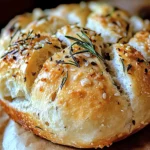
Easy Roasted Garlic Rosemary Artisan Bread – The Best Homemade Loaf
If you’re looking for the perfect homemade loaf to impress your family and friends, then look no further! Easy Roasted Garlic Rosemary Artisan Bread – The Best Homemade Loaf is not just a recipe; it’s a treasured tradition in my kitchen. Every time I bake this bread, the warm, comforting scent of roasted garlic fills my home, creating an inviting atmosphere that brings everyone together.
This rustic bread is incredibly versatile, making it ideal for busy weeknights or special family gatherings. Whether you’re serving it alongside dinner or enjoying a slice with some olive oil for dipping, this bread will become a staple in your home as it has in mine.
Why You’ll Love This Recipe
- No-Knead Delight: This recipe requires minimal effort and no kneading at all. Just mix and let the dough rise!
- Flavor Galore: The combination of roasted garlic and fresh rosemary gives this bread an aromatic twist that elevates any meal.
- Perfect for Any Occasion: Whether it’s a cozy dinner or a festive gathering, this bread fits right in.
- Make Ahead Flexibility: With its long fermentation time, you can prepare the dough ahead of time and bake whenever you’re ready.
- Crusty and Chewy: The end result is a beautiful crust with a chewy interior—just like your favorite artisan bakery bread!
Ingredients You’ll Need
Gathering simple, wholesome ingredients is part of the joy of baking this Easy Roasted Garlic Rosemary Artisan Bread. You’ll find everything you need at your local grocery store. Let’s dive into what makes this loaf so special!
For the Bread Dough:
- 1 whole head garlic
- 1 tablespoon extra-virgin olive oil (divided)
- Coarse sea salt & freshly ground black pepper
- 1½ cups water (room temperature, ~70°F / 21°C)
- 1 teaspoon active dry yeast
- 3 cups bread or all-purpose flour (plus more for dusting)
- ½ teaspoon dried oregano
- 1 teaspoon kosher or fine sea salt
- 2 teaspoons finely chopped fresh rosemary (plus more for topping)
- 1 head roasted garlic cloves (smashed)
Variations
One of the best things about this recipe is its flexibility! Feel free to experiment with different flavors based on your preferences.
- Add Cheese: Mix in some shredded cheese like mozzarella or cheddar for a cheesy delight.
- Include Olives: Toss in some chopped olives for a briny kick that pairs wonderfully with rosemary.
- Change the Herbs: Try using thyme or basil instead of rosemary to create a different flavor profile.
- Make It Whole Wheat: Substitute half of the all-purpose flour with whole wheat flour for added nutrition.
How to Make Easy Roasted Garlic Rosemary Artisan Bread – The Best Homemade Loaf
Step 1: Roast the Garlic
Roasting garlic transforms its sharpness into sweet, mellow goodness. Preheat your oven to 400°F (204°C). Cut the garlic head in half, drizzle exposed cloves with olive oil, sprinkle with salt and pepper, and wrap it in foil. Roast it for about 40 minutes until soft, then cool before removing the cloves from their skins.
Step 2: Mix the Dough
In a small bowl, dissolve the yeast in room-temperature water and let it sit for 10–15 minutes until bubbly. In a large bowl, combine flour, salt, oregano, and rosemary. Add the yeast water, smashed roasted garlic cloves, and remaining olive oil. Mix with a spatula until you have a sticky dough—don’t worry too much about perfection!
Step 3: First Rise
Cover the bowl with a clean towel and let it rise at room temperature for 8–10 hours until it’s doubled in size. This slow rise develops incredible flavor and texture.
Step 4: Shape and Cold Ferment
Gently turn the dough onto a floured surface and shape it into a ball without overworking it. Place seam-side up in a floured bowl or basket, cover it again, and refrigerate for anywhere from 1 to 24 hours—or up to 48 hours if you’re craving deeper flavors!
Step 5: Preheat Oven & Score
When you’re ready to bake, preheat your oven to 450°F (232°C) with a Dutch oven inside. Carefully remove the dough from refrigeration and invert it onto parchment paper (seam-side down). Score the top with a sharp blade—this helps control how your bread expands while baking.
Step 6: Bake
Transfer your dough into the preheated Dutch oven using the parchment paper as support. Cover it up and bake for 30 minutes. Then uncover and bake another 15–20 minutes until it’s golden brown—your kitchen will smell heavenly by now!
Step 7: Cool & Slice
Once baked to perfection, remove your loaf from the Dutch oven and let it cool on a wire rack for at least an hour before slicing. This cooling period helps set the crumb structure so every slice is just right!
Now you have all you need to make Easy Roasted Garlic Rosemary Artisan Bread – The Best Homemade Loaf! Enjoy every bite!
Pro Tips for Making Easy Roasted Garlic Rosemary Artisan Bread – The Best Homemade Loaf
Making homemade bread can be a delightful experience, and with these pro tips, you’ll elevate your baking game!
-
Use Fresh Ingredients: Always use fresh yeast and high-quality olive oil to ensure the best flavor and rise in your bread. Stale ingredients can lead to disappointing results.
-
Monitor Room Temperature: The dough’s rising time can vary greatly depending on the room temperature. If it’s too cold, consider placing the dough in a warm spot, like near a sunny window or inside an oven with just the light on.
-
Experiment with Flour Types: While bread flour is fantastic, feel free to mix in some whole wheat or spelt flour for added nutrition and flavor. Just keep in mind this may alter the texture slightly.
-
Be Gentle When Shaping: Handle the dough gently to retain the air bubbles that have formed during fermentation. This will give your bread that lovely chewy texture.
-
Let it Cool Completely: It can be tempting to slice into your loaf right away, but letting it cool for at least an hour allows the crumb to set properly. This will enhance both texture and flavor when you finally dig in!
How to Serve Easy Roasted Garlic Rosemary Artisan Bread – The Best Homemade Loaf
This artisan bread makes for a stunning centerpiece at any meal! Here are some delightful ways to serve it:
Garnishes
- Sprinkled Sea Salt: A light sprinkle of coarse sea salt on top right before serving adds a burst of flavor.
- Fresh Rosemary Sprigs: A few fresh sprigs of rosemary placed on or beside the loaf not only look beautiful but also provide a fragrant aroma.
Side Dishes
- Olive Oil Dipping Sauce: Mix together extra-virgin olive oil with balsamic vinegar and herbs for a delicious dipping sauce that complements the flavors of the bread beautifully.
- Roasted Vegetables: A medley of seasonal roasted vegetables, such as carrots, bell peppers, and zucchini tossed in olive oil and herbs pairs wonderfully with this rustic loaf.
- Soup: Serve alongside a hearty vegetable soup or creamy tomato basil soup for a comforting meal that warms your soul.
- Salad: A crisp salad with mixed greens, cherry tomatoes, and a light vinaigrette offers a refreshing contrast to the warm bread.
Now that you’re ready to make your Easy Roasted Garlic Rosemary Artisan Bread – The Best Homemade Loaf, gather your ingredients, roll up your sleeves, and enjoy the wonderful aroma filling your kitchen! Happy baking!
Make Ahead and Storage
This Easy Roasted Garlic Rosemary Artisan Bread is perfect for meal prep! You can make it ahead of time, store it, and enjoy fresh slices throughout the week. Here’s how to keep your delicious loaf at its best.
Storing Leftovers
- Wrap the cooled bread in plastic wrap or aluminum foil to keep it fresh.
- Store at room temperature for up to 3 days.
- For longer freshness, place it in a paper bag instead of plastic to maintain its crustiness.
Freezing
- Slice the bread before freezing for easy access.
- Wrap each slice tightly in plastic wrap and then place them in an airtight freezer bag.
- Freeze for up to 3 months. To enjoy later, just thaw at room temperature or pop into the toaster.
Reheating
- Preheat your oven to 350°F (175°C).
- Wrap the whole loaf or slices in aluminum foil and heat for about 10-15 minutes until warmed through.
- For a crispy crust, unwrap the foil during the last few minutes of reheating.
FAQs
Here are some common questions you might have about making this delightful bread!
How do I make Easy Roasted Garlic Rosemary Artisan Bread?
Making this artisan bread is simple! With just a few ingredients and no kneading required, you’ll roast garlic, mix everything together, let it rise overnight, shape it, and bake it in a Dutch oven for that perfect crusty finish.
Can I use different herbs in my Easy Roasted Garlic Rosemary Artisan Bread?
Absolutely! While rosemary adds a wonderful flavor, you can experiment with other herbs like thyme or oregano based on your taste preferences. Just remember to adjust the quantities according to your liking!
What should I serve with Easy Roasted Garlic Rosemary Artisan Bread?
This bread pairs beautifully with soups, salads, or as a side for any main dish. It’s also fantastic for dipping into olive oil or balsamic vinegar for an appetizer!
Can I make this bread gluten-free?
Yes! Substitute all-purpose flour with a gluten-free flour blend that works well for baking. The texture may vary slightly but should still be delicious.
Final Thoughts
I hope you find joy in making this Easy Roasted Garlic Rosemary Artisan Bread – it’s truly special with its rustic charm and rich flavors. Whether you’re sharing it with loved ones or savoring it solo, every bite is a warm hug from your kitchen. Enjoy baking this delightful loaf, and don’t hesitate to reach out with your experiences or any questions you might have!
Easy Roasted Garlic Rosemary Artisan Bread
If you’re in search of a delightful homemade loaf that will impress your family and friends, try the Easy Roasted Garlic Rosemary Artisan Bread. This no-knead recipe combines the aromatic flavors of roasted garlic and fresh rosemary, creating a rustic bread that’s not only easy to make but also incredibly versatile. Perfect for busy weeknights or festive gatherings, this bread can be served alongside dinner, enjoyed with olive oil for dipping, or even paired with soups and salads. With minimal effort and a simple rise-and-bake method, this artisan loaf becomes a staple in any kitchen.
- Prep Time: 15 minutes
- Cook Time: 55 minutes
- Total Time: 1 hour 10 minutes
- Yield: Approximately 12 servings 1x
- Category: Bread
- Method: Baking
- Cuisine: Italian
Ingredients
- 1 whole head garlic
- 1 tablespoon extra-virgin olive oil (divided)
- Coarse sea salt & freshly ground black pepper
- 1½ cups water (room temperature)
- 1 teaspoon active dry yeast
- 3 cups bread or all-purpose flour (plus more for dusting)
- ½ teaspoon dried oregano
- 1 teaspoon kosher or fine sea salt
- 2 teaspoons finely chopped fresh rosemary (plus more for topping)
Instructions
- Roast the Garlic: Preheat oven to 400°F (204°C). Cut the garlic head in half, drizzle with olive oil, sprinkle with salt and pepper, wrap in foil, and roast for about 40 minutes until soft.
- Mix the Dough: Dissolve yeast in water for 10–15 minutes. In a bowl, mix flour, salt, oregano, rosemary; add yeast mixture and smashed roasted garlic. Combine until dough is sticky.
- First Rise: Cover and let rise at room temperature for 8–10 hours until doubled.
- Shape & Cold Ferment: Shape into a ball without overworking. Place seam-side up in a floured bowl; refrigerate for 1 to 24 hours.
- Preheat Oven & Score: Preheat oven to 450°F (232°C). Invert dough onto parchment paper and score the top.
- Bake: Transfer dough to Dutch oven using parchment paper; cover and bake for 30 minutes, then uncover and bake an additional 15–20 minutes until golden brown.
- Cool & Slice: Let cool on a wire rack for at least an hour before slicing.
Nutrition
- Serving Size: 1 slice
- Calories: 130
- Sugar: 0g
- Sodium: 200mg
- Fat: 2g
- Saturated Fat: 0g
- Unsaturated Fat: 2g
- Trans Fat: 0g
- Carbohydrates: 25g
- Fiber: 1g
- Protein: 4g
- Cholesterol: 0mg