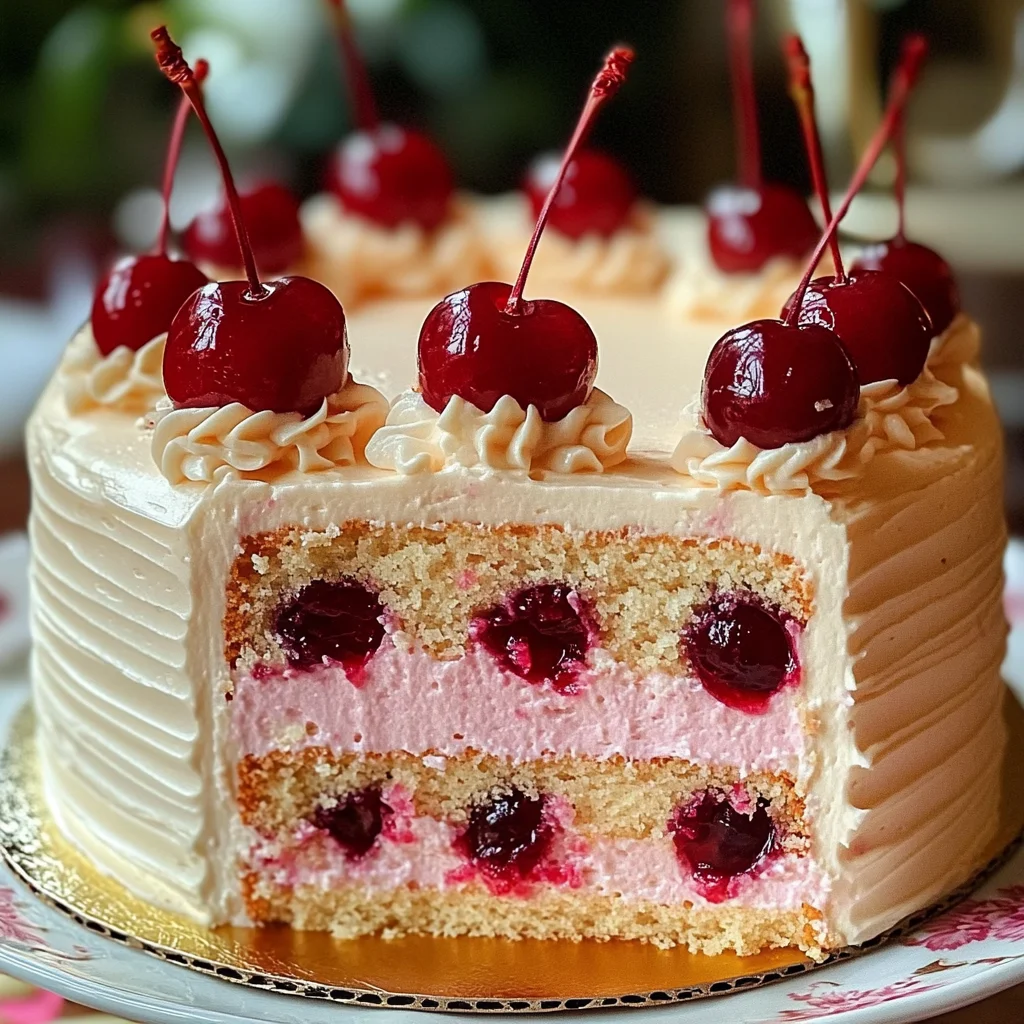
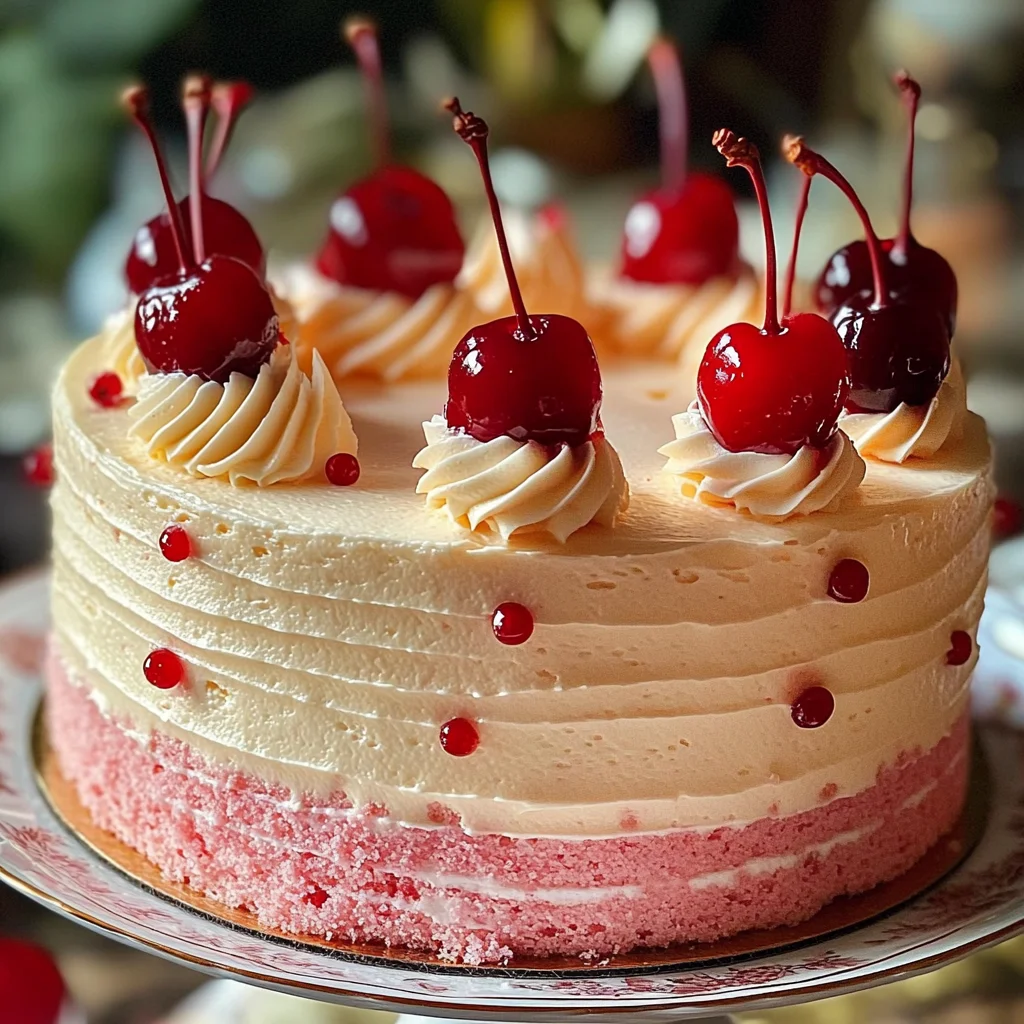
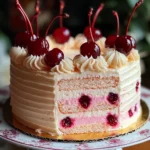
Vintage Maraschino Cherry Cake
If you’re looking for a dessert that brings back warm memories and brightens up any gathering, this Vintage Maraschino Cherry Cake is just the ticket! With its soft texture and delightful cherry flavor, it’s like a hug in cake form. Whether you’re celebrating a birthday, hosting a family gathering, or simply craving something sweet to treat yourself, this cake is sure to impress everyone at the table.
The vibrant pink hue and cream frosting make this cake not only delicious but also a showstopper! It holds a special place in my heart because it reminds me of childhood celebrations filled with laughter and joy. And the best part? It’s surprisingly easy to whip up!
Why You’ll Love This Recipe
- Nostalgic Flavor: The sweet taste of maraschino cherries transports you back to simpler times.
- Easy to Make: With straightforward steps, even novice bakers can create a stunning dessert.
- Family-Friendly: Kids love the fruity flavor, making it perfect for family gatherings or birthday parties.
- Make-Ahead Friendly: Bake the layers ahead of time and frost them when you’re ready to serve!
- Visually Stunning: The beautiful pink color makes it an eye-catching centerpiece on any dessert table.
Ingredients You’ll Need
Gathering your ingredients for this Vintage Maraschino Cherry Cake is part of the fun! You’ll find that these are simple, wholesome ingredients that you may already have in your pantry. Here’s what you’ll need:
For the Cake
- 2 ½ cups all-purpose flour
- 2 ½ teaspoons baking powder
- ½ teaspoon salt
- ¾ cup unsalted butter, softened
- 1 ¾ cups granulated sugar
- 4 large eggs
- ½ cup maraschino cherry juice
- ½ cup milk
- 2 teaspoons vanilla extract
- ¾ cup maraschino cherries, chopped
For the Frosting
- 1 cup unsalted butter, softened
- 4 cups powdered sugar
- 2 tablespoons maraschino cherry juice
- 1 teaspoon vanilla extract
- 2 tablespoons milk (if needed for consistency)
- Whole maraschino cherries for garnish
Variations
One of the lovely things about this recipe is its flexibility. You can easily adjust it to suit your taste or dietary preferences. Here are some fun variation ideas:
- Add Some Zest: Incorporate lemon or almond extract for an extra layer of flavor.
- Change Up the Cherries: Try using different types of cherries or even fresh berries if you want a twist.
- Frosting Fun: Experiment with cream cheese frosting instead of traditional buttercream for a tangy touch.
- Layer It Up: Create a layered version with additional fillings like whipped cream and fruit between layers.
How to Make Vintage Maraschino Cherry Cake
Step 1: Preheat & Prepare Pans
Preheat your oven to 350°F (175°C). This step is crucial as it ensures that your cake bakes evenly. Grease and flour two 9-inch round cake pans or line them with parchment paper. This will prevent sticking and make removing the cakes a breeze!
Step 2: Mix Dry Ingredients
In a medium bowl, whisk together the flour, baking powder, and salt. Setting these dry ingredients aside gives them time to blend nicely before adding them to your batter.
Step 3: Cream Butter & Sugar
In a large mixing bowl, beat the softened butter and sugar together until light and fluffy. This step incorporates air into the mixture, which helps create a tender cake texture.
Step 4: Add Eggs & Flavorings
Beat in the eggs one at a time until well combined. Then mix in the vanilla extract and maraschino cherry juice. These flavors will shine through in every bite!
Step 5: Incorporate Dry Ingredients & Milk
Gradually add the dry ingredients in three parts, alternating with the milk. Mixing just until combined prevents overworking the batter which can lead to dense cakes.
Step 6: Fold in Cherries
Gently fold in the chopped maraschino cherries into your batter. This adds delightful bursts of sweetness throughout each slice!
Step 7: Bake the Cakes
Divide the batter evenly between your prepared cake pans. Bake for 25-30 minutes or until a toothpick inserted into the center comes out clean. The smell will be heavenly!
Step 8: Cool Completely
Let the cakes cool in their pans for about 10 minutes before transferring them to a wire rack to cool completely. Cooling properly is key so that your frosting doesn’t melt off when you decorate.
Step 9: Prepare the Frosting
In another bowl, beat together room temperature butter until creamy. Gradually add powdered sugar while mixing until smooth. Then stir in maraschino cherry juice and vanilla extract until well combined.
Step 10: Assemble & Decorate
Spread frosting over one layer of cake before placing the second layer on top. Frost around and on top of the entire cake until it looks just right! Finally, garnish with whole maraschino cherries for that classic vintage look.
Now you have a charming Vintage Maraschino Cherry Cake that’s ready to be enjoyed! Serve it up at your next gathering or enjoy it as an everyday treat—either way, you’re going to love every slice!
Pro Tips for Making Vintage Maraschino Cherry Cake
Baking is all about enjoying the process, and these tips will help you create a perfect Vintage Maraschino Cherry Cake that’s sure to impress!
-
Use Room Temperature Ingredients: Bringing your butter, eggs, and milk to room temperature helps them combine more easily, resulting in a smoother batter and a fluffier cake.
-
Don’t Overmix the Batter: Once you add the dry ingredients, mix just until combined. Overmixing can lead to a dense cake rather than a light and airy texture.
-
Check for Doneness: Ovens can vary in temperature. Start checking your cakes a few minutes before the suggested baking time by inserting a toothpick in the center; it should come out clean or with a few moist crumbs.
-
Let Cakes Cool Completely: Allowing your cakes to cool completely before frosting is crucial for preventing the icing from melting and sliding off. It also ensures better flavors meld together.
-
Customize Your Frosting: Feel free to experiment with flavors! Adding almond extract or lemon zest can give your frosting an extra zing that pairs beautifully with the cherries.
How to Serve Vintage Maraschino Cherry Cake
Presenting your cake beautifully can elevate any gathering. Here are some suggestions on how to serve this delightful dessert!
Garnishes
- Chopped Nuts: A sprinkle of chopped walnuts or pecans on top adds a lovely crunch and complements the sweetness of the cherries.
- Fresh Mint Leaves: Placing a few mint leaves around the base of the cake not only enhances its visual appeal but also adds a refreshing aroma.
- Edible Flowers: For an elegant touch, consider adding edible flowers like pansies or nasturtiums, which will bring color and whimsy to your presentation.
Side Dishes
- Vanilla Ice Cream: The creamy richness of vanilla ice cream pairs perfectly with the sweet cherry flavors in the cake, creating a classic dessert experience.
- Whipped Coconut Cream: For a dairy-free option, whipped coconut cream provides a luscious addition that complements the cake’s sweetness without overpowering it.
- Fruit Salad: A light, refreshing fruit salad made with seasonal fruits balances out the richness of the cake and offers a colorful contrast on your plate.
- Coffee or Tea: Serving slices of this delightful cake alongside freshly brewed coffee or herbal tea creates a cozy atmosphere that’s perfect for afternoon gatherings or dessert after dinner.
Enjoy making and serving your Vintage Maraschino Cherry Cake! This delightful treat is bound to become a favorite at any occasion.
Make Ahead and Storage
This Vintage Maraschino Cherry Cake is perfect for meal prep, allowing you to enjoy a slice of nostalgia any day of the week. Whether you’re planning for a celebration or just want a sweet treat on hand, this cake holds up wonderfully when stored or frozen.
Storing Leftovers
- Store leftover cake in an airtight container at room temperature for up to 3 days.
- For longer storage, refrigerate the cake, where it can last for up to a week.
- Ensure the cake is covered with plastic wrap or foil to maintain its moisture.
Freezing
- To freeze, wrap individual slices in plastic wrap, then place them in a freezer-safe bag.
- Alternatively, freeze the entire cake wrapped securely in plastic wrap and aluminum foil.
- It can be stored in the freezer for up to 3 months.
Reheating
- Thaw slices in the refrigerator overnight before enjoying.
- To warm, microwave each slice for about 10-15 seconds until just warmed through—perfect if you enjoy your cake slightly warm!
FAQs
Here are some common questions regarding the Vintage Maraschino Cherry Cake that might help you as you bake.
Can I use fresh cherries instead of maraschino cherries for the Vintage Maraschino Cherry Cake?
While fresh cherries can be used, they won’t provide the same sweet and vibrant flavor as maraschino cherries. Stick with maraschino cherries for that classic taste!
How should I serve the Vintage Maraschino Cherry Cake?
Serve the Vintage Maraschino Cherry Cake chilled or at room temperature. Pair it with ice cream or whipped topping for an extra special treat!
Can I make the Vintage Maraschino Cherry Cake gluten-free?
Yes! Substitute all-purpose flour with a gluten-free all-purpose flour blend. Make sure to check that your baking powder is gluten-free as well.
Final Thoughts
I hope you find joy in creating this delightful Vintage Maraschino Cherry Cake! Its soft texture and beautiful pink hue will surely bring smiles to your loved ones. Don’t hesitate to share your baking experience and any twists you may add along the way. Happy baking!
Vintage Maraschino Cherry Cake
Indulge in the delightful Vintage Maraschino Cherry Cake, a charming dessert that brings back warm memories and brightens any gathering. With its soft, fluffy texture and vibrant cherry flavor, this cake is like a sweet hug in every slice. Perfect for birthdays, family gatherings, or just a treat for yourself, this nostalgic cake is easy to make and visually stunning with its pink hue and creamy frosting. Enjoy the bursts of maraschino cherries throughout each bite while impressing your guests with this delightful creation.
- Prep Time: 20 minutes
- Cook Time: 30 minutes
- Total Time: 50 minutes
- Yield: Approximately 12 servings 1x
- Category: Dessert
- Method: Baking
- Cuisine: American
Ingredients
- 2 ½ cups all-purpose flour
- 2 ½ teaspoons baking powder
- ½ teaspoon salt
- ¾ cup unsalted butter, softened
- 1 ¾ cups granulated sugar
- 4 large eggs
- ½ cup maraschino cherry juice
- ½ cup milk
- 2 teaspoons vanilla extract
- ¾ cup maraschino cherries, chopped
- For the frosting: 1 cup unsalted butter, softened
- 4 cups powdered sugar
- 2 tablespoons maraschino cherry juice
- 1 teaspoon vanilla extract
- 2 tablespoons milk (if needed for consistency)
- Whole maraschino cherries for garnish
Instructions
- Preheat the oven to 350°F (175°C) and prepare two 9-inch round cake pans.
- Whisk together flour, baking powder, and salt in a medium bowl.
- Cream softened butter and sugar until fluffy; add eggs one at a time, then mix in vanilla and cherry juice.
- Gradually add dry ingredients alternately with milk, mixing just until combined. Fold in chopped cherries.
- Divide batter between pans and bake for 25-30 minutes or until a toothpick comes out clean.
- Cool cakes completely before frosting with buttercream mixed with cherry juice.
Nutrition
- Serving Size: 1 slice (90g)
- Calories: 360
- Sugar: 32g
- Sodium: 220mg
- Fat: 16g
- Saturated Fat: 10g
- Unsaturated Fat: 5g
- Trans Fat: 0g
- Carbohydrates: 50g
- Fiber: 1g
- Protein: 4g
- Cholesterol: 85mg